I’ve been doing one adjustment a lot recently and I think it would be super useful to share it with you all – Colour Curves – It’s a simple adjustment using curves in Photoshop but it has the power to completely change the look and feel of an image. I often use it to add atmosphere or change the mood to something more mystical or wistful.
I’ve recorded a step by step mid-way through an edit of Pippi. You can watch that over on the channel (broken record: please subscribe), or you can read the steps with screenshots on this page if you prefer.
I hope it is useful for you!
Step by step how-to:
Step 1: Open Photoshop & Create a curves adjustment layer:
Click on your upper-most layer if you’re mid edit like I was, and click the adjustment layer icon in the lower task bar. Select Curves… – this will open the curves panel.
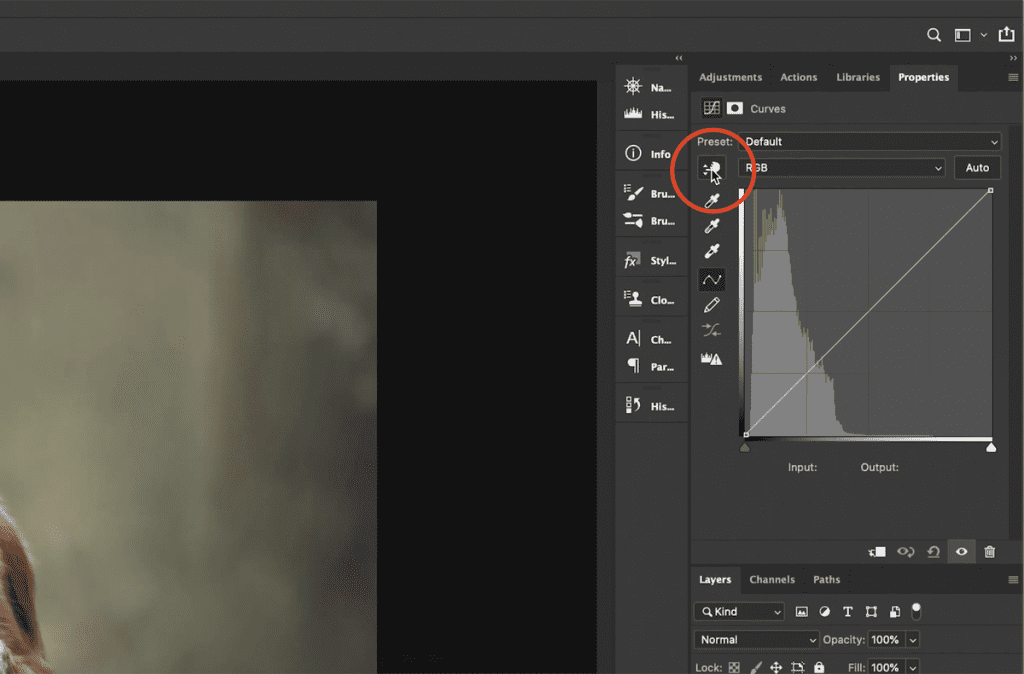
Step 2: Get to know the hand toggle tool
Within the curves adjustment panel, there is a little icon displaying a hand with two arrows, one above, one below. Click on this icon.With this icon selected, go ahead and move your cursor over the image. If you keep an eye on the curves mid-line, you should see circles appear. These circles represent the “brightness” of the pixels under your cursor. So in this screenshot example, the background to the left of Pippi’s head is in the shadows section of the curves midline. If you grab hold of an area by clicking, you can then drag upwards or downwards to lighten or darken that areas brightness values. You could lift your shadows and drop your highlights using this tool.
Now that you know how to use the curves hand tool, it’s time to work on toning.
Step 3: Meet colour curves
In your curves adjustment layer, click the field that says “RGB” by default and select Blue from the dropdown. This will only look at the blue colour channel, and if you remember from our colour theory lessons, Blue is opposite to Yellow. So adding Blue will lessen Yellow and removing Blue will add Yellow.
Step 4: Focus on the Blue colour channel
With your Blue channel selected, and your hand tool active, hover over one of the darker areas of your image. The circle on the curves midline should be in the lower right-hand corner, but not right at the very edge of the line. Once here, click and drag your cursor upwards. This will add blue to the darks.When altering the highlights, I find it easier (in a darker scene like this) to just click on the curve line itself in the highlights area. For this one, we want to pull it down. This will remove blue (add yellow) to the highlights and upper mid-tones in the image.A handy tip with the highlights is to look at the input value and reduce it for the output value. For example, if the input value is 199, anything below 199 will remove blue from the scene at that point on the line – therefore adding yellow.
Step 5: Fine tune your colour curves
You can add more than just those two points on the curves line and you can also exaggerate any of the points for a more severe adjustment. When complete, you can then reduce the opacity if you need to, or mask your subject out if the curves adjustment as affected their coat colour. A video for how to mask hair can be found here.
And that’s it! You can, of course, use this adjustment with any of the colour channels, I just gravitate to blue!
Please give it a try and let me know how you get on ?
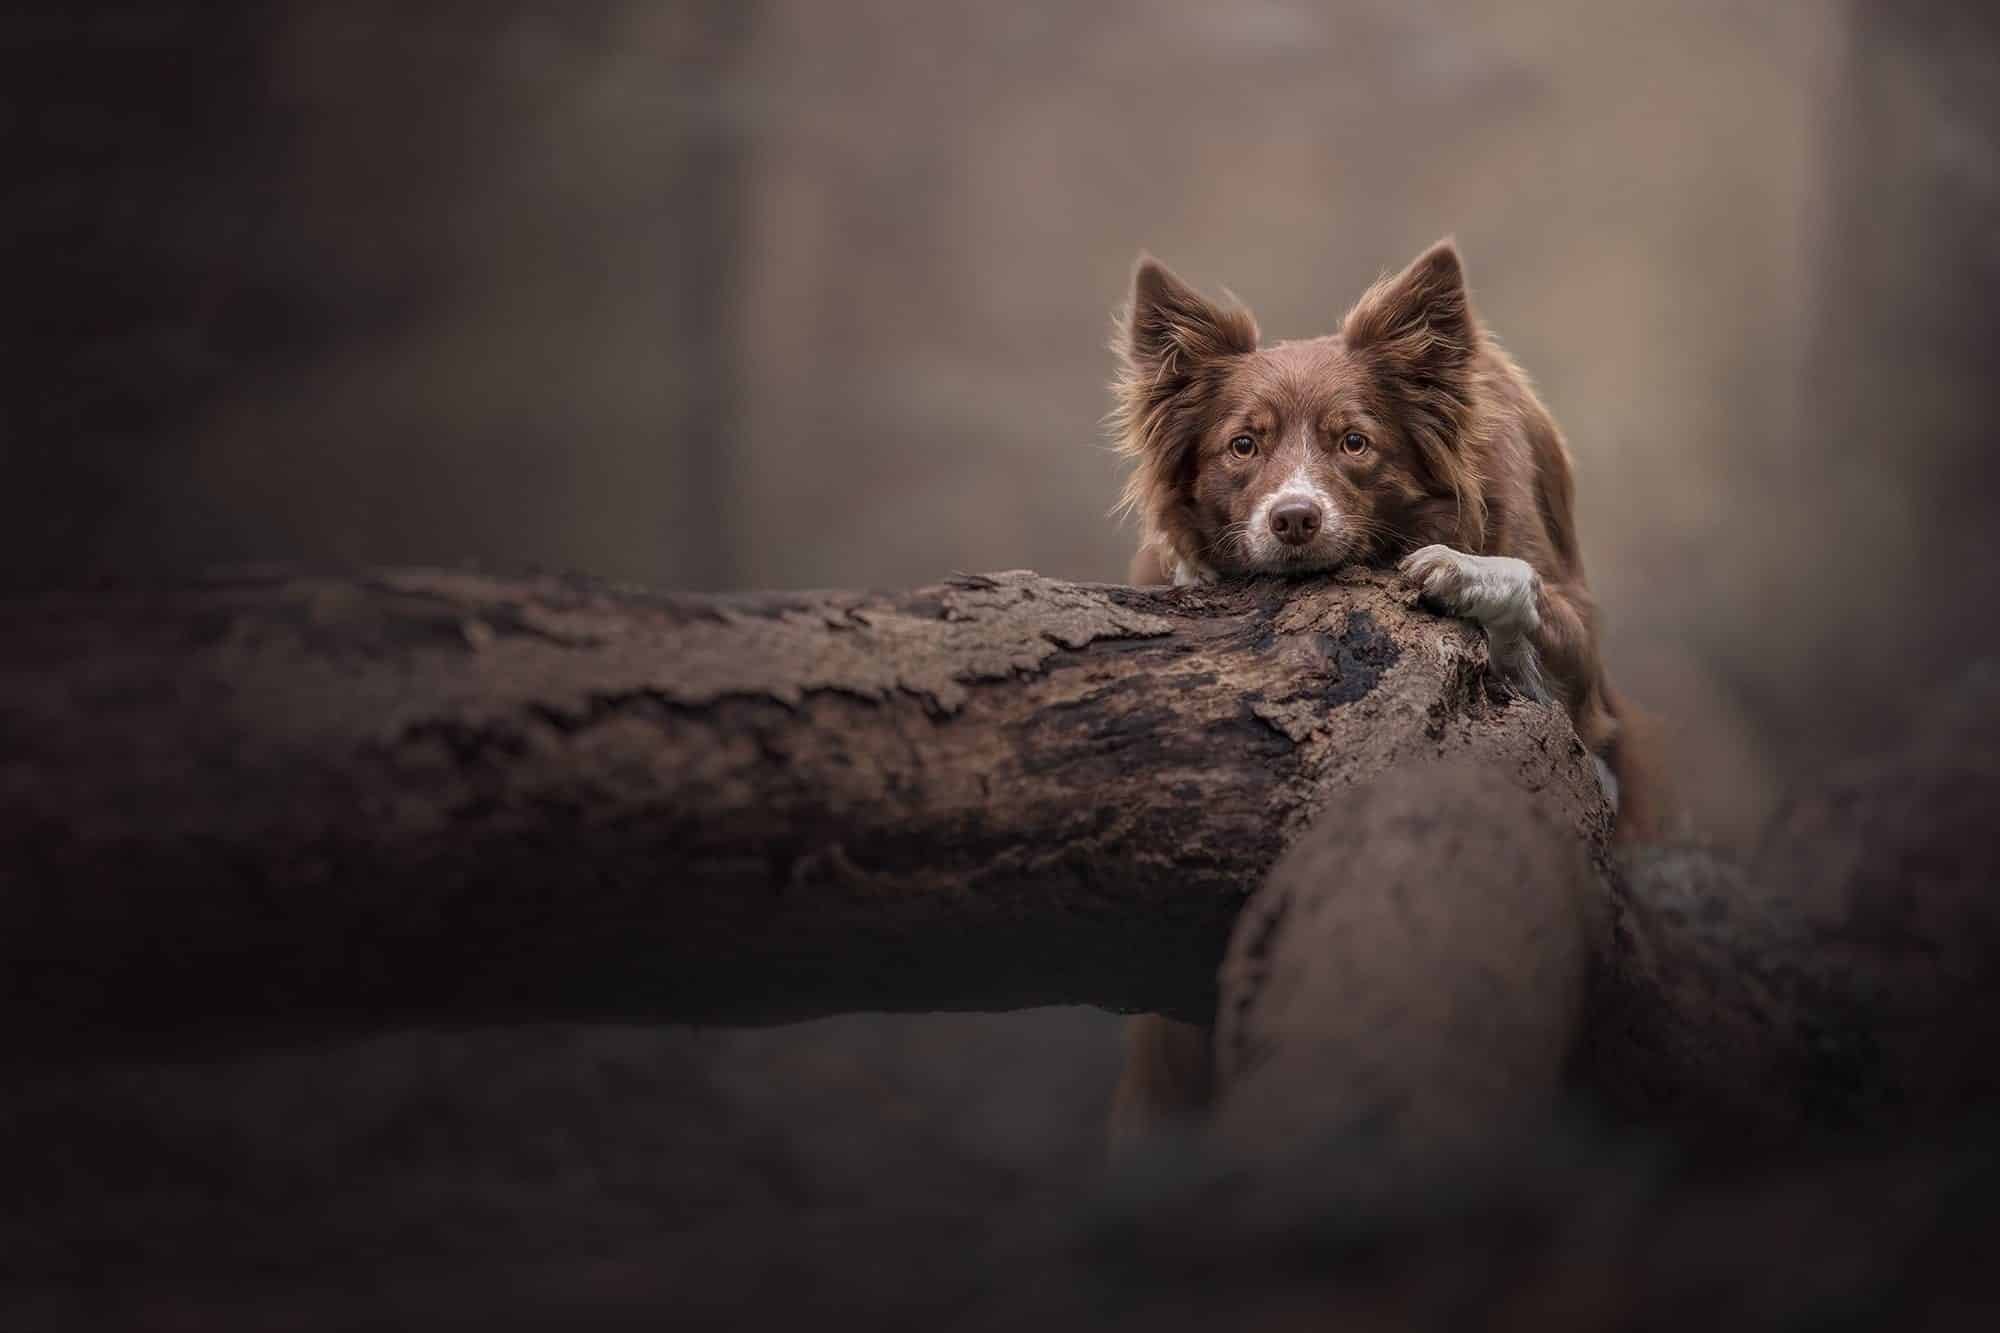
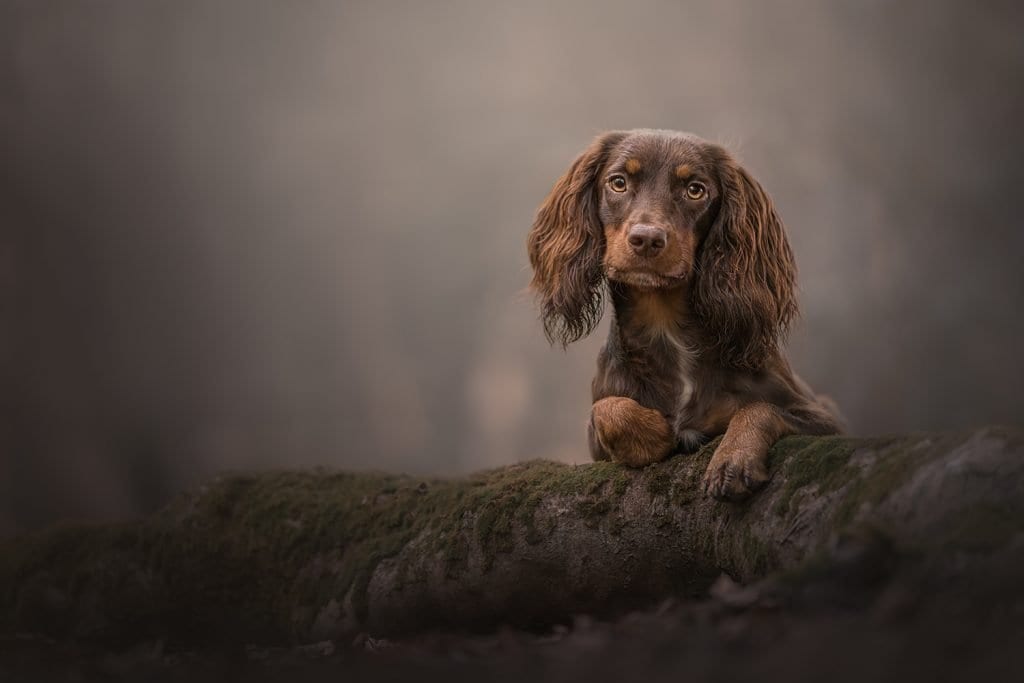
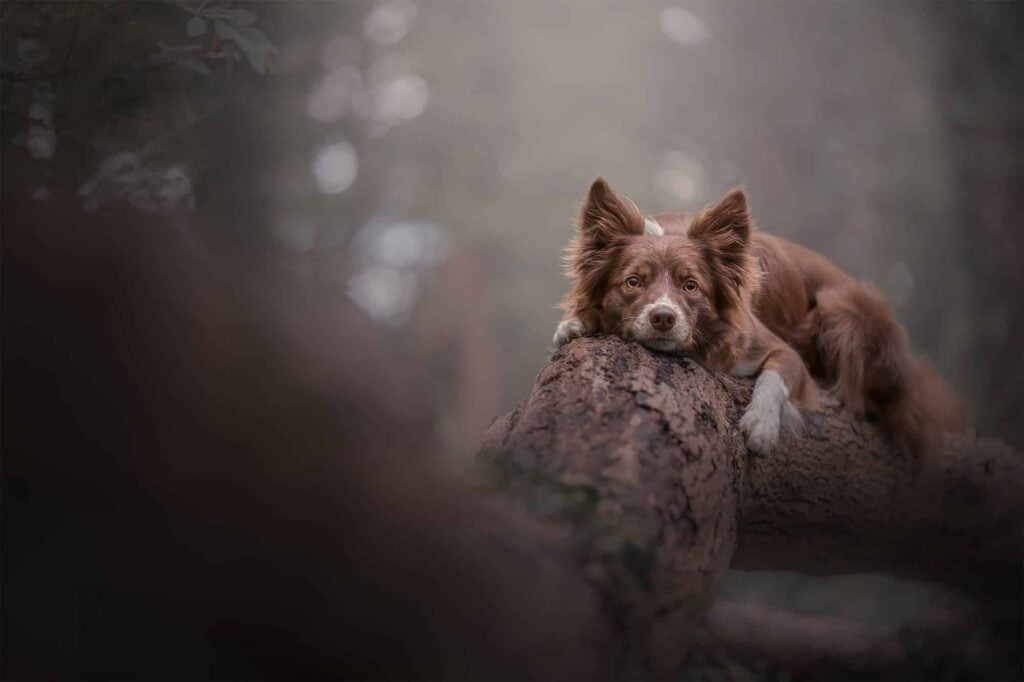
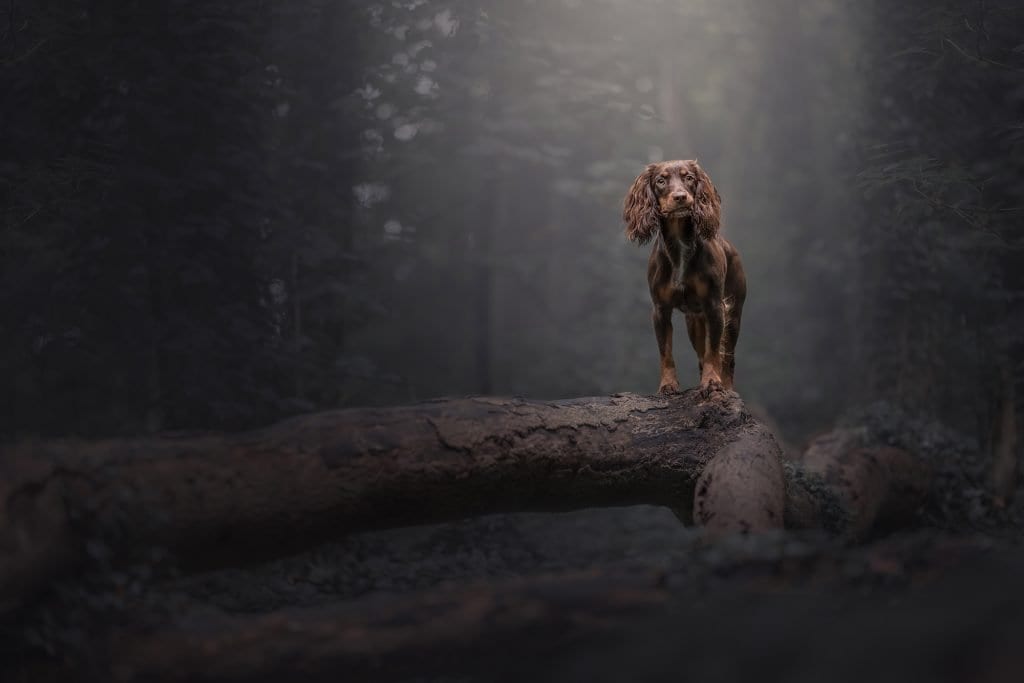
The following images all had this colour treatment, with a stronger application on each one as you move through. So the first image was very light, the middle was a medium application and the last image was a heavy application. Of course, the darker the overall image, the more blue you will introduce as more of the image is in the shadow section.