
You’d be hard-pressed to find a human alive in 2023 who doesn’t LOVE the Remove Tool in Photoshop – those who do photography, that is. The Remove Tool is Adobe Photoshop’s extra healing tool thrown into the mix alongside the fairly basic Spot Healing Brush Tool, the epic Healing Brush Tool, and the other lesser-known and somewhat less versatile tools in the same set. The Remove Tool came into the healing party misunderstood and, like everyone else, I was misled at first.
See, the thing is, Adobe named Generative Fill as a Remove Tool at first, so you’d be totally forgiven for thinking that the Remove Tool uses Firefly AI technology to run its replacements. Even more so because of the delay in its reaction time which seems like it’s doing some cloud magic at the same time. Thankfully, at the time of writing I have confirmation from Adobe’s team that the Remove Tool doesn’t use any Generative features, and the two function in very different ways:
So there we have it…
The Remove Tool is just the result of the Spot Healing Brush Tool and Content-Aware Fill having a baby who, for all intents and purposes, is smarter than both of them.
Now that’s not to say that the tool doesn’t use AI. Content-aware fill does too, as does running a sky replacement, or a subject selection. The difference in this AI and THAT AI is the fact that the AI is scanning your own image to find pixels to use to best repair the area you’ve selected. Whereas, in a generative example, AI scans its knowledge of everyone else’s (paraphrased) images to work out what new pixels it could create to go in that spot. It’s important to understand the difference, as they each have ethical and competition implications.
Shall we go through how to use it now that this is all out of the way? If you dislike reading, here’s a video to run through how to use this tool and fix its current fingerprinting issue:
Let’s run through some of the basic steps:
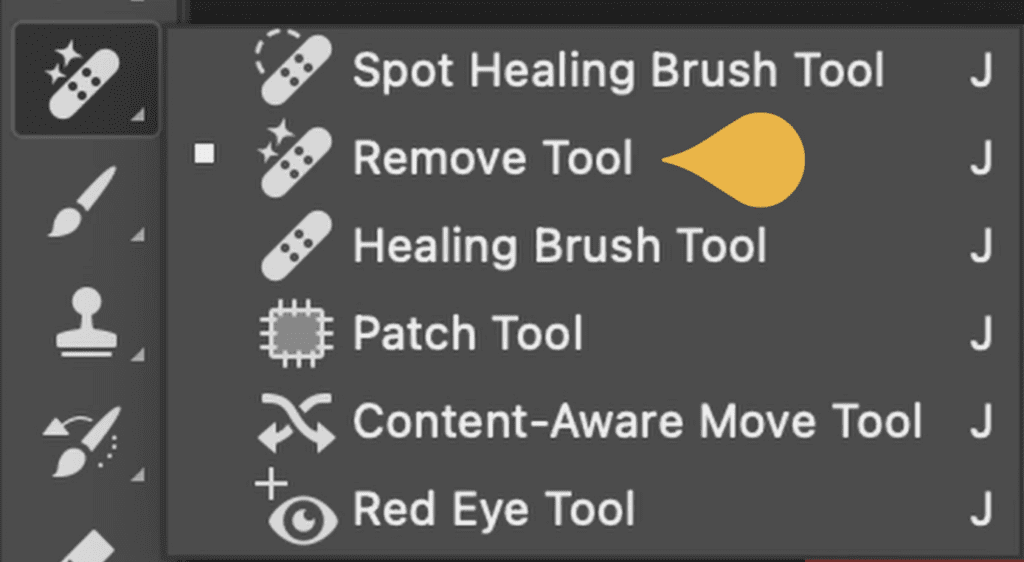
How to find the Remove Tool in Photoshop:
Head to the toolbar on the far left-hand side of most Photoshop layouts and search for any of these icons in the right-hand list below. If you can see any of them, right-click on it and you’ll get the drop-down list. Inside here, find the Remove Tool. It’s the one with sparkles next to it.
How to use the Remove Tool in Photoshop:
In simple terms, all you need to do is click on something that you’d like Photoshop to remove and then the Remove Tool will just remove it.
However, for my own personal use of the Remove tool in Photoshop, we do something slightly different.
- In the top toolbar after selecting the Remove Tool, go ahead and uncheck the checkbox that says, “Remove after each stroke”, so that it looks like the screenshot below:

- Make any selection you would like on the image of stuff you want to remove
- I like to work in small clusters. When you have a few selected, hit Enter or Return on the keyboard
As you work through your image, you might have a totally perfect result end to end. Or, you might end up with the Fingerprint.
The Remove Tools big issue: Fingerprinting
Occasionally, the Remove Tool will give you a subtle but obvious pattern inside a replacement. It’s hard to discern, but hopefully, you’ll be able to see it in this screenshot. We have random noise on each side, and then in the center, there are some vertical and horizontal lines:
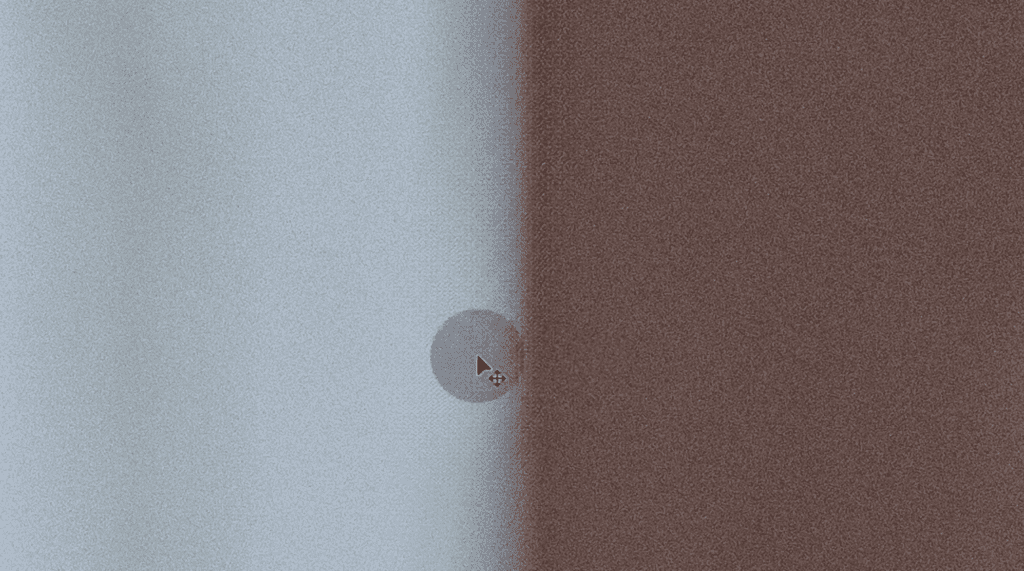
This is the Remove Tool’s fingerprint and it is a really big problem with the tool. It’ll probably be solved soon, but just in case, we need to know how to fix it.
- Start by trying the Healing Brush tool, pulling a relevant source section, and attempting to correct the issue this way
- If your image is high in noise or heavily detailed, you might see a ring left around the replaced area, if so…
- Grab the clone stamp tool and go back to 2010 on that area. Carefully blend it to remove the ring and heal the section.
When you’re finished, your bits will be removed, like Peanut’s leash from this image below. To learn some different full editing tutorial workflows, check out the Membership.