
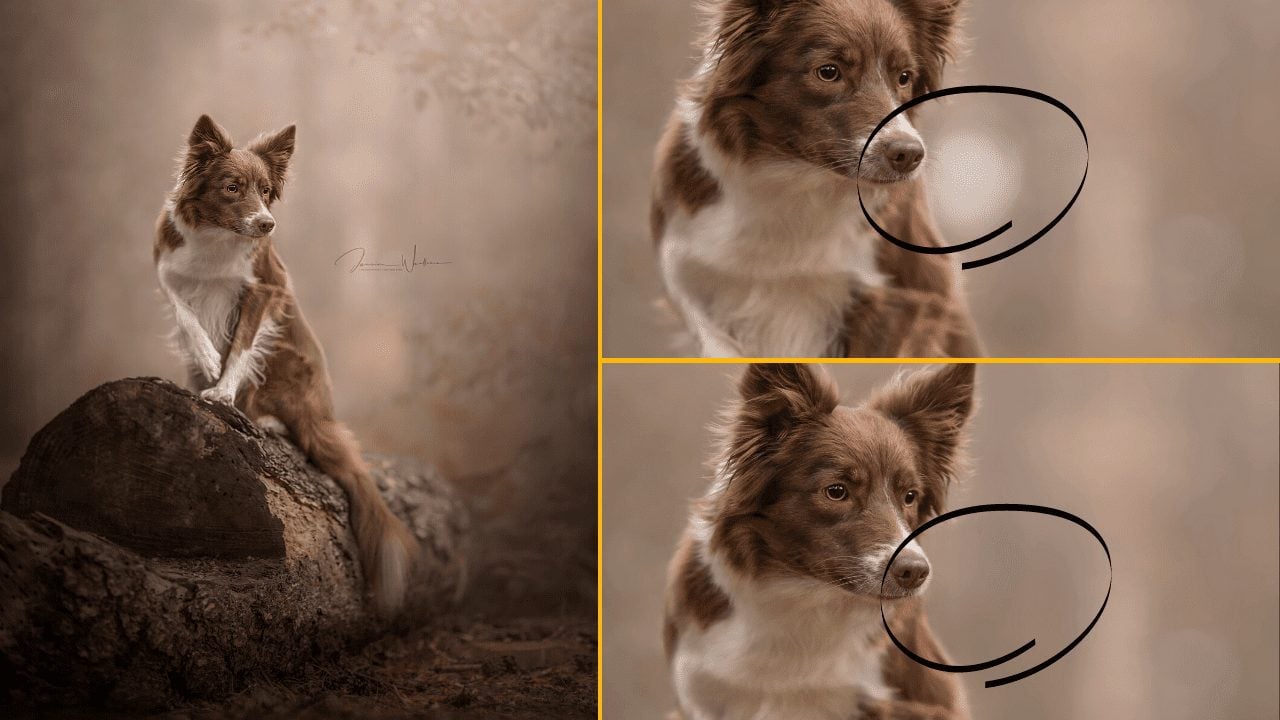
I’ve realised that I haven’t shared this method and I genuinely use it ALL of the time so I felt that this week was the week to pop this one out there. In this video (or post), we’re going to walk through the steps involved in removing objects and distractions that cross through the line of the dog. It could be a branch, bokeh circle or an arm – it doesn’t matter!
Link to the video walkthrough:
The process
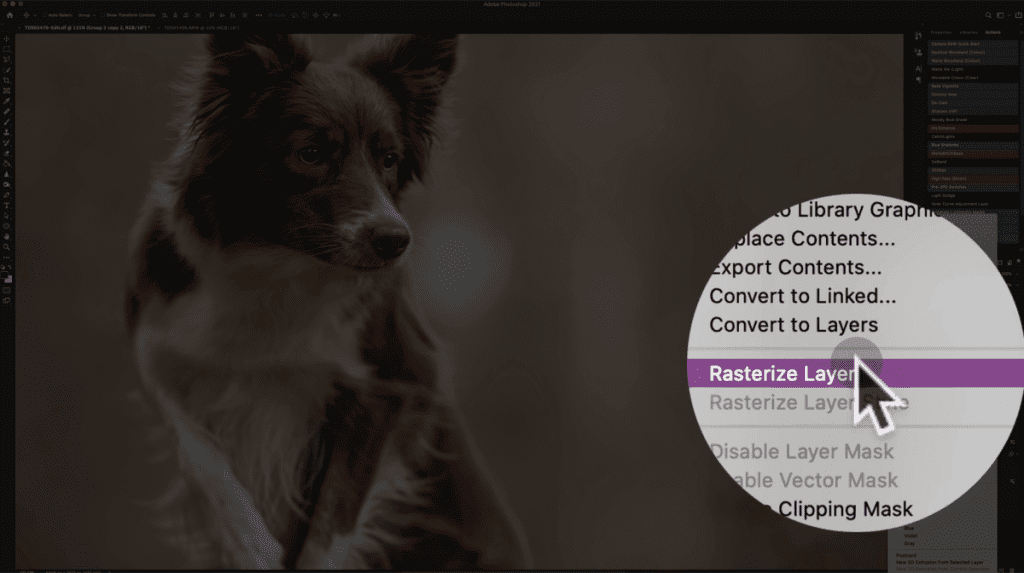
To start with, have your image open in PS. You can either start from the very first opening, or you can do this a little through the editing process. You need to have clicked on your active image layer – the “image” itself. For me, it’s wrapped up as a smart object, so if yours is too, you’ll need to add an extra little step in a second.

Duplicate this layer by pressing Command + J (or Control + J on Windows). With this layer duplicated, you’re ready to continue. If your layer is a SMART OBJECT LAYER you now need to rasterise your duplicated layer. Just right click over the name of the layer and choose Rasterize Layer from the list. If your image isn’t a smart object layer, ignore this step.
Next you need a gooooood hair mask around the subject. If you don’t know how to do a good mask, head here first and join us back when you have your mask sorted.
With a mask to hand, make sure it is on the new duplicated layer. I borrowed a mask from another layer, so I just held down Option (or Alt) and clicked and dragged the mask from another layer down onto my new duplicated layer. When you release the mouse click, your mask will now be copied over.

With the mask in place, it’s time to remove that distraction! Always start with the Clone Stamp Tool because the other “content aware” based methods will get confused at the line of the dog. Grab the clone stamp tool…

And select a source area by holding down Option (or Alt) and clicking once. Then, go to your distraction and start to click and drag to replace the pixels there with your source data. Remember to have your clone stamp set to 100% opacity, 100% flow and have it nice and soft and big.

You’ll hopefully end up with something that looks reasonably realistic?!

Next, we’re going to neaten up the mask. Go ahead and click once on the mask attached to your cloned up layer. Then, grab a brush (B on the keyboard) and make it either black or white to paint on or off the mask. Experiment to see where you need to go but try to get a seamless blend between subject and background. You WILL need to alter the hardness of the brush to compensate for changes in blurriness from your lenses depth of field.

The result should be a much more pleasing image, minus the distraction you removed. Here was mine at this stage:

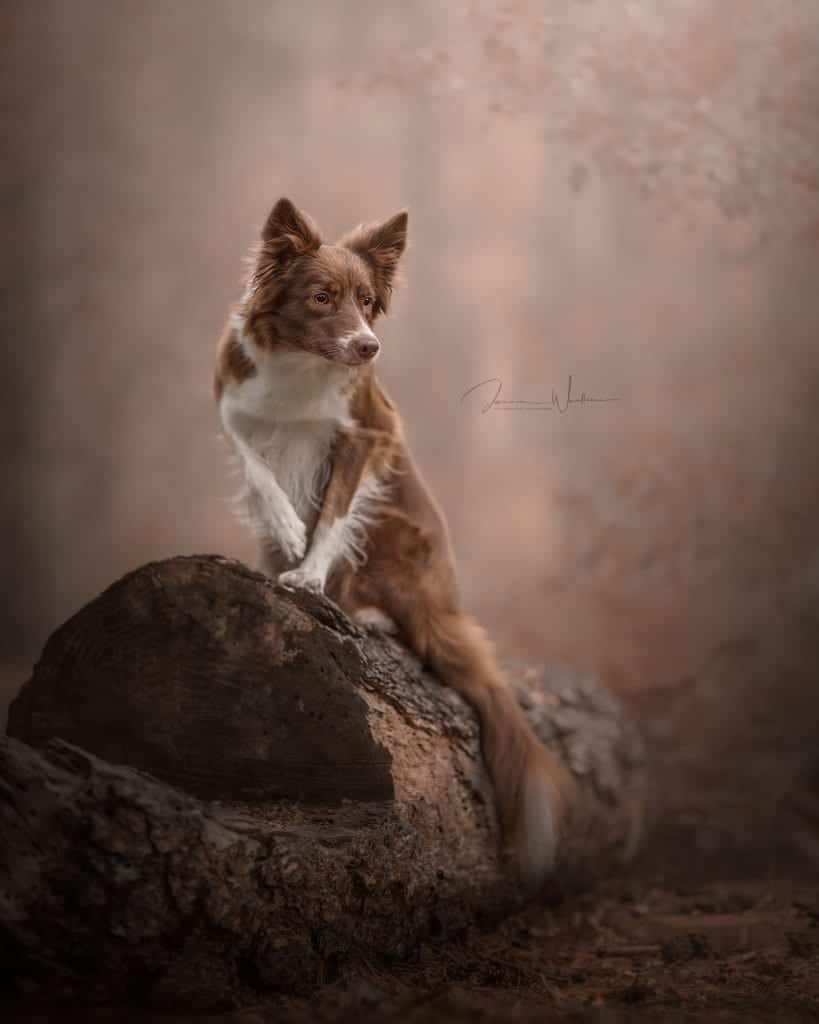
After the rest of my workflow, we ended up here!
After having a hard time with photoshop I am getting there and get better and better. Your tutorials are a great help with it and I am looking forward to seeing more of it.
Thank you for all your work and I will get in touch for a one to one session.