Where on earth do you start as a newbie into the world of flash photography? Off camera flash photography for beginners (this post) is here to help demystify the basics of these magical light-creating beasts in a way that I hope helps you jump in with two feet and your eyes wide open. That’s the plan anyway.
This post is split into two sections because there is just so much information to run through, and I’ve popped a video summarising the main points in each too. The format of this post is as follows:
Contents
Flash Photography for Beginners Part 1:
Flash Photography for Beginners Part 2: (release on 19th March 2021)
With the contents all laid out (and clickable, by the way), we’ll jump in to the first chunk of this topic with…
Section 1: Flash Photography for Beginners Part 1
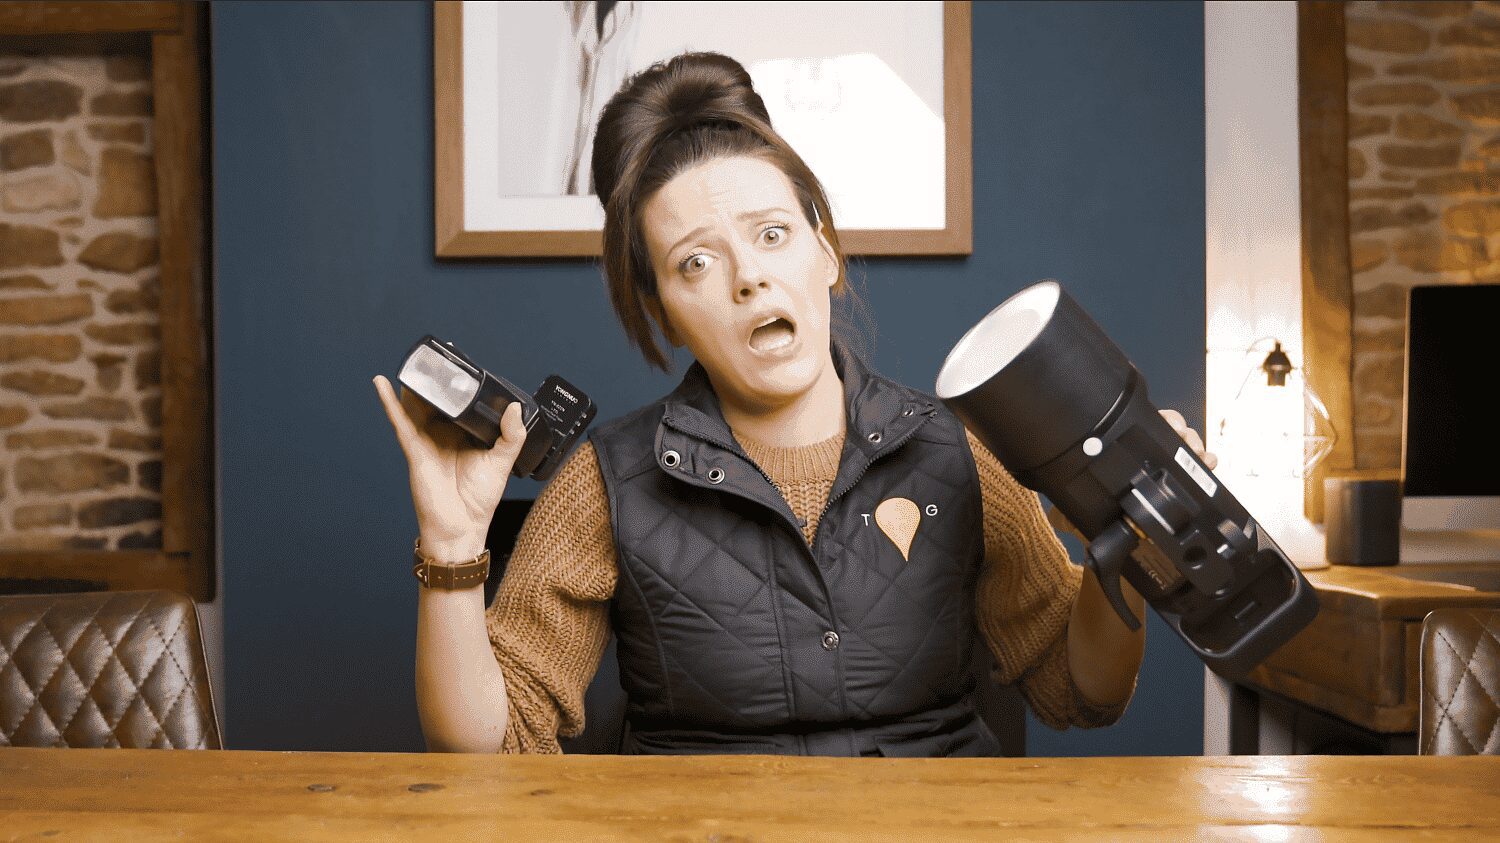
Speedlights vs Strobes
Let’s start with a very simple run-through of speedlights vs strobes, because this is one of the most confusing things when getting started as a beginner to flash photography.
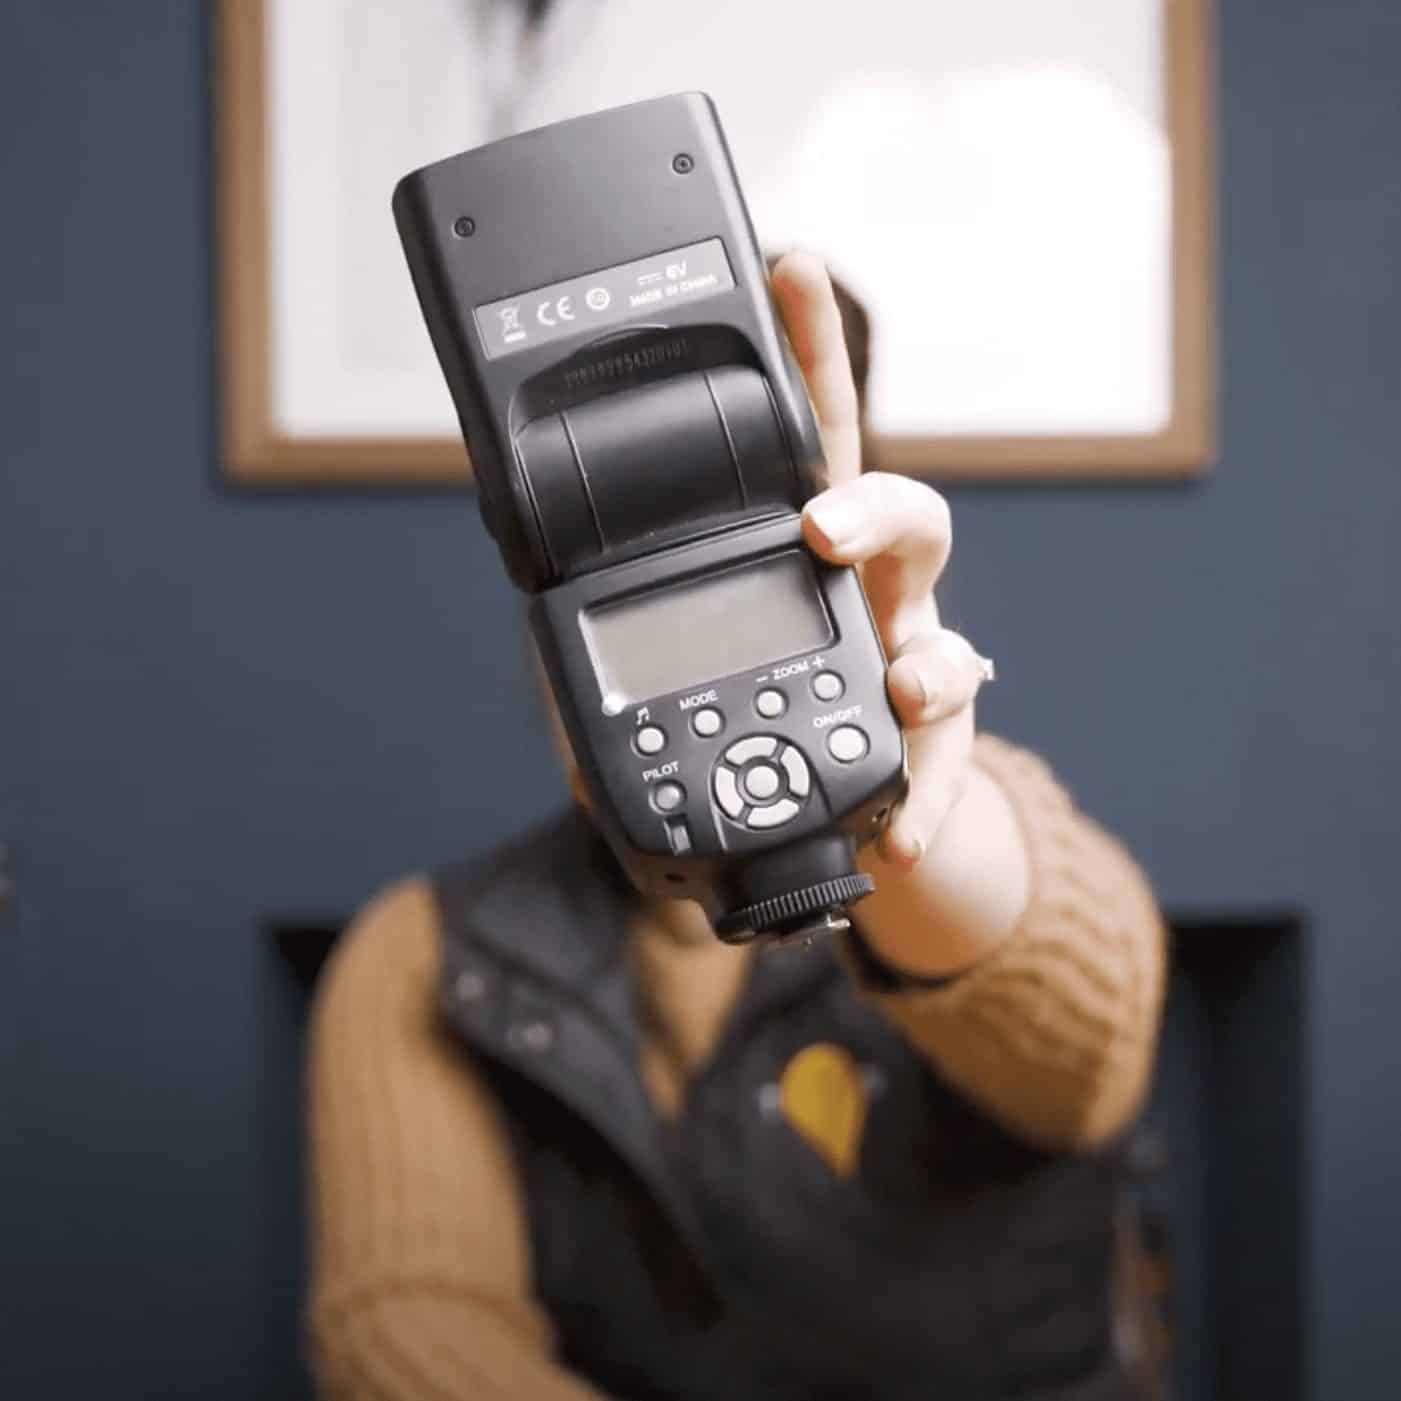
Speedlights:
- Can be on or off camera
- Very affordable
- Versatile and flexible
- Lack the power of strobes
- Usually have a longer flash duration which is important if you want to freeze action in studio
- Tend to run on batteries – rechargeable double A’s are your most eco-friendly and cost-effective option here
- Large array of modifiers – just get the right brackets!
A good beginner speedlight would probably be something from the Yongnuo range – super cheap but good for learning!
You WILL need the associated triggers and the right hotshoe mount for your camera brand.
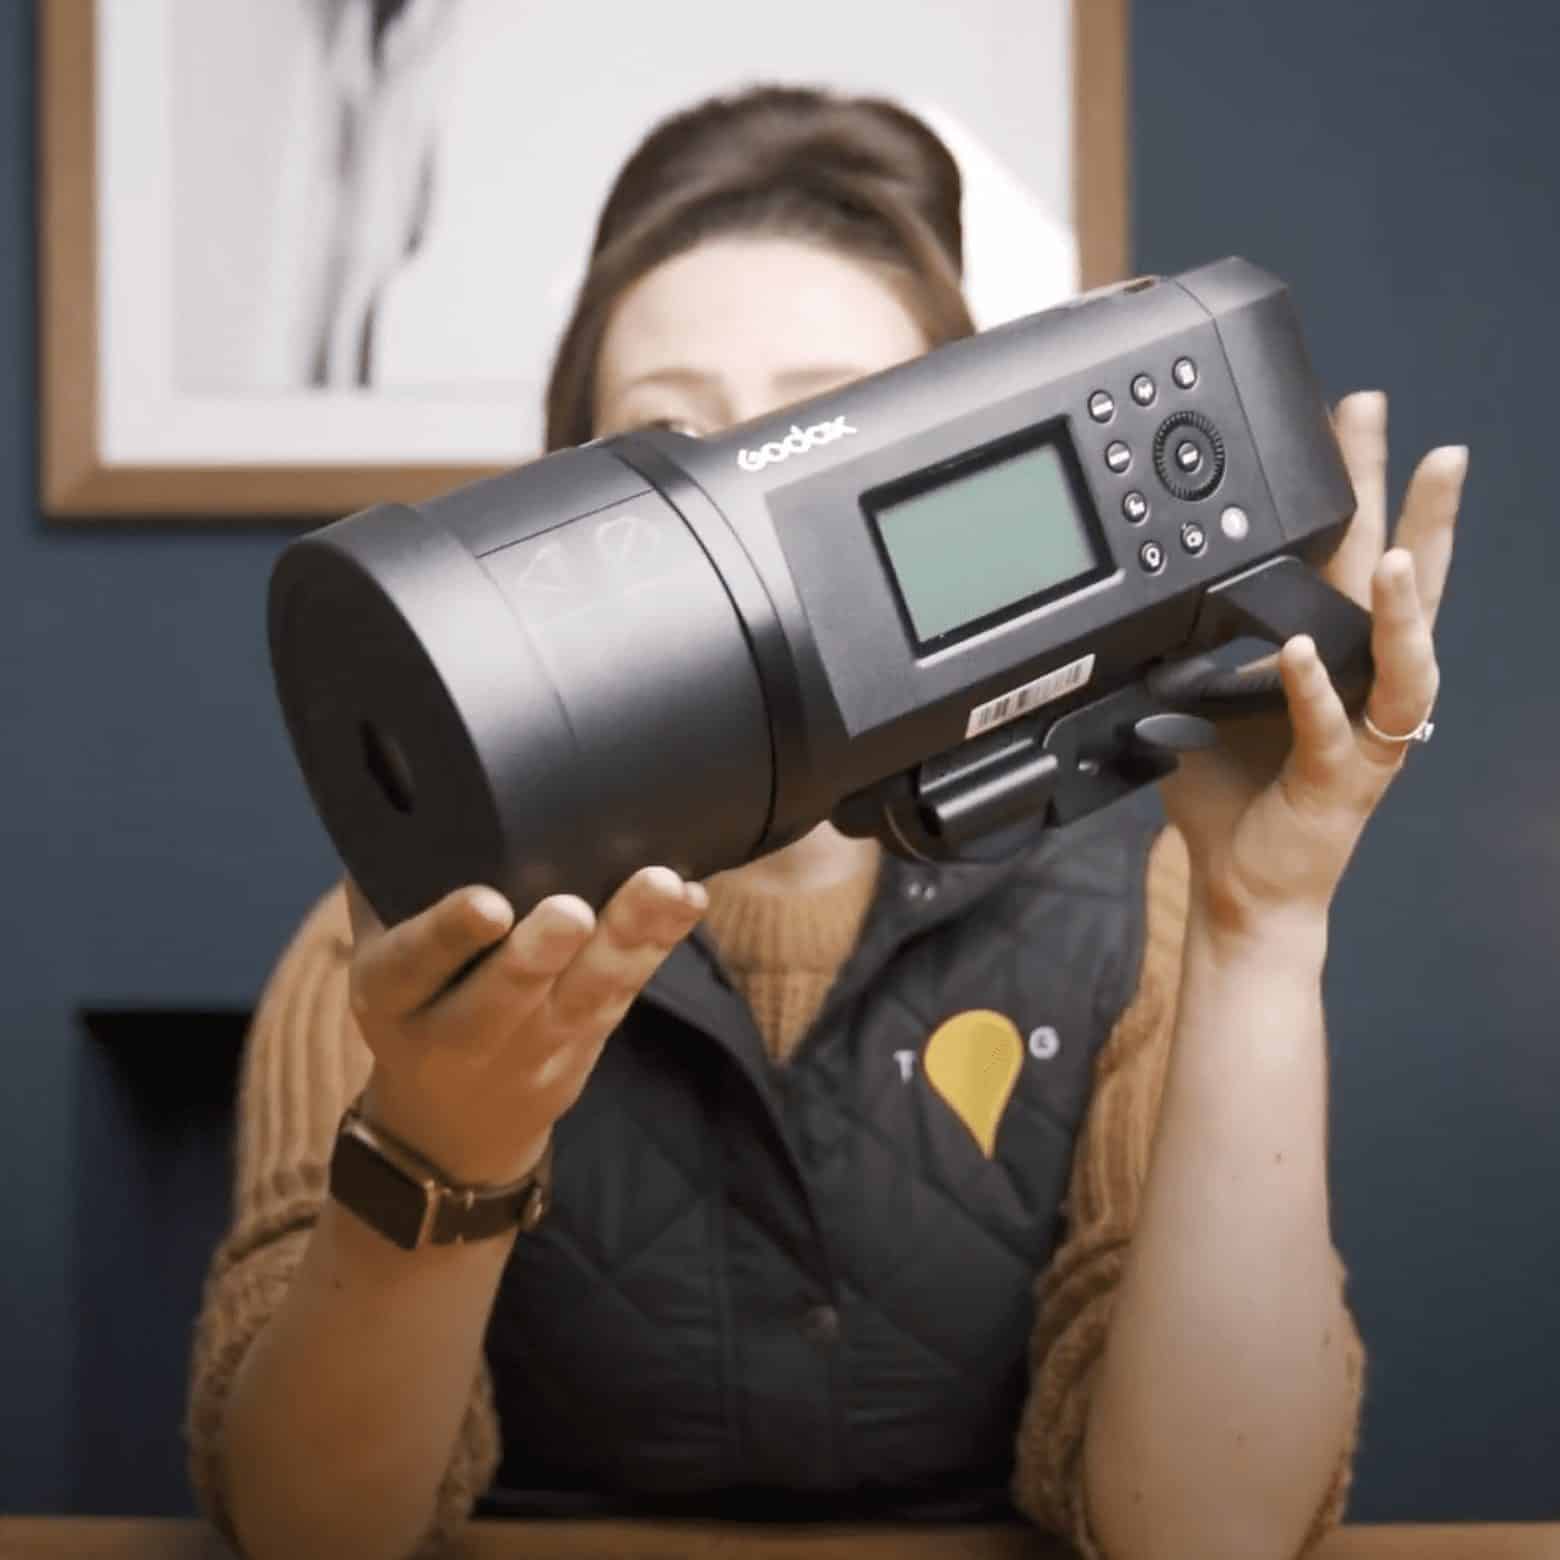
Strobes:
- Always off camera
- Tend to be larger and heavier than speedlights
- Range of prices, but the price usually reflects the specs in terms of power, reliability, flash duration, modes and options like modelling lights
- Usually have modelling lights for focussing and seeing the light before you shoot
- Can be cordless or corded (some can be both)
- Modifiers are selected by Mount but usually are not specific to the brand:
- Bowens S mount / s-type
- Elinchrom mount
- Profoto Mount
A good beginner strobe would probably be something like the Godox AD200 which is nice and small, affordable and would be a more straightforward first step into strobes than the bigger options.
You WILL need the associated triggers and the right hotshoe mount for your camera brand.
Triggers. What are they, and how do they work?
There are four commonly seen names for this part of the kit which are:
- Triggers
- Transmitters
- Recievers
- Transcievers
Each name just references what that part of the set is doing as its main job, and the role of these in your kit bag are to talk between the camera and the flash unit. These are the connection through the air.
Triggers (or insert any of the names beginning with Tr here), sit on top of your camera on the hotshoe. This connection allows the passage of information between the camera and the trigger so it’s vitally important that you have the right hotshoe connection on your trigger. When you buy your equipment, there will be a camera brand with it so make sure if you have a Canon that you get the Canon trigger for your lights.
Tip: Screw your trigger down into the hotshoe until it is firmly connected, but not so tight that you struggle to loosen it with two fingers.
For Strobes, the receiver part of the connection (where the trigger sends the “hey, flash NOW” message) is usually built-in. It’s normal to not be able to see the receiver so you just need to think of your strobe itself as the receiver.
For Speedlights, it is a little different. The Speedlight is made to sit on top of your camera’s hotshoe, so taking it away from the hotshoe and adding a trigger in its place just leaves it naked and alone. Nobody wants to be naked and alone. So you need to pair that light up with a receiver (usually packaged with the lights respective trigger). It’s just another box, try not to worry about it too much.
How do triggers work though?
Kind of just like a radio really. Both parts, the trigger and the receiver (or the strobe if it is built-in) will have the option to change the channel. A channel just specifies which part of the frequency they can talk to each other on. Make sure they’re both on the same channel and all will be fine.
Tip: If you’re shooting with another photographer and their trigger is firing your flashes, one of you just needs to switch over to a different channel to regain control.
With your connections talking on the same channel, it’s then time to think about groups. A Group is just a way to organise your lights so that you can alter settings and control them from a distance, using the trigger on top of your camera. Basically, it’s great for people who don’t have time (or don’t want) to keep going over to their lights to change things.
Usually, groups work in letters, Group A, Group B, and so on. You can have a single light in each group or you can have multiple lights in each group, that’s up to you. From the trigger, you can then alter the modes, power settings, and more without wasting time.
Section 2: Flash Photography for Beginners Part 2
Flash Settings
With the equipment explained we can begin to discuss the actual settings. This is where most people get scared and run away – please don’t. Stick with me, you can do this!
We’ll start by looking at the settings on the actual flashes themselves, starting at the most important part – the power settings. For the purposes of this post, by power I mean the brightness of the flash that comes out of the light.
Each light has its own maximum power, some are 150w, some are 600w. That value is the maximum power it can throw out as a single flash of light, and this is referred to in most brands of light as 1/1.
As a beginner to flash photography, you need to know that 1/1 is full power and any smaller fraction than that whole is a division of the total power. If you have a 600w light, 1/2 power would be 300w. If you have a 100w speedlight, 1/2 power would be 50w.
The power is shown on the light as a fraction, like this:
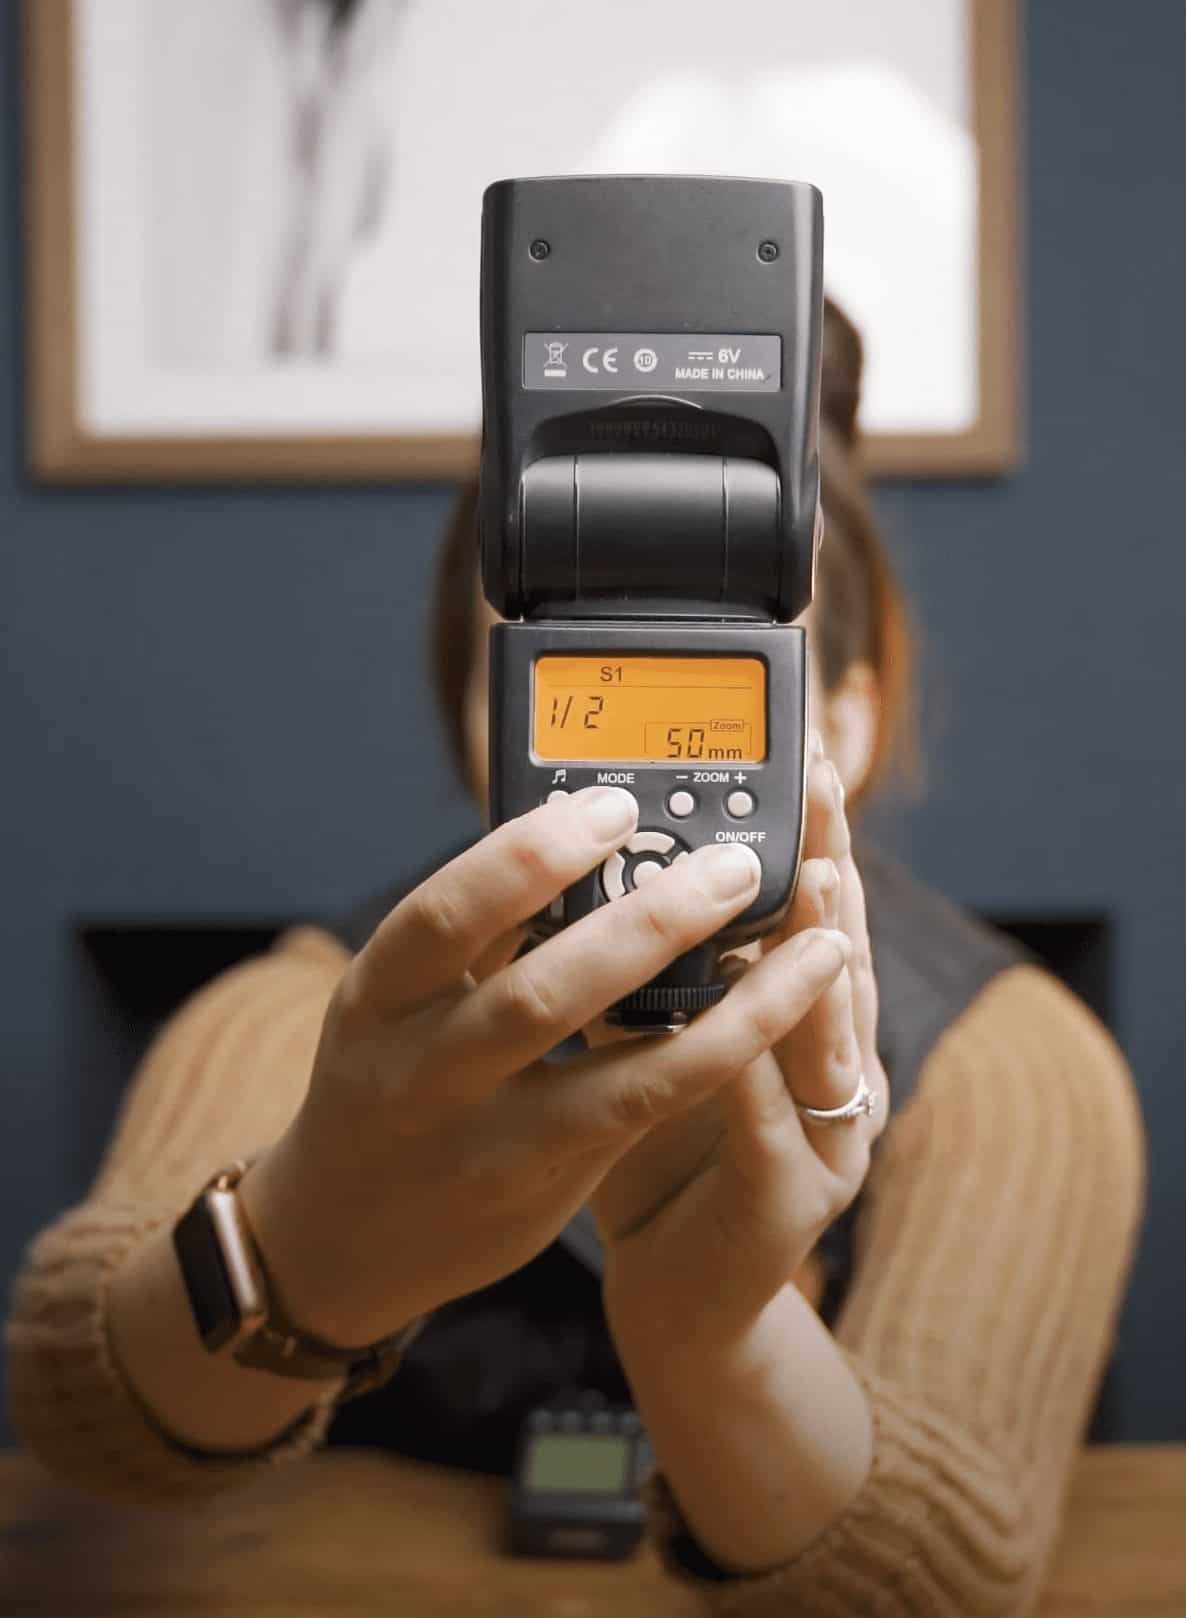
So the bigger the number after the / the lower the power of the flash coming out.
But that’s not all – there are mini-steps between these fraction jumps and those are usually done in thirds (roughly). So you can have 1/2 +0.3 which is a third of a step added onto 1/2. The next step is +0.7, then the light would move up to the next fraction, in this case, 1/1.
Some lights to go in tenths, so +0.1, +0.2 and so on. Some brands do not use the fraction system – Profoto is an example of this where their lights just go up in equal steps from 0 to 10 with 10 being full power.
So we know how to increase the power of our lights, right? We just make the number after the / in the fraction smaller and add mini-steps of +something if we need a little bit extra too.
Flash Modes
There are four things in this section that we need to know about:
- Manual Mode
- Slaves
- TTL
Manual Mode: This mode lets you dial in the power and control everything manually to your own tastes. This is what I use for studio work because I am in full control of the exposure and adjustments to build the light. You set your power for each light and off you go.
Slave Mode: This mode allows you to dial everything in like manual mode, but the flash will fire only when it sees another flash. This is handy for if you are mixing strobe brands, or speedlights and strobes, because you only need to trigger one of the lights from the camera for all of them to flash.
Remember that this relies on the light seeing other flashes, so it is not suitable for use outdoors in bright sunlight, or in situations where multiple flashes are going off not under your control.
TTL: Through The Lens – This mode uses the cameras metering and exposure values to add an adequate amount of light from the flash automatically. You can drop your cameras exposure compensation to reduce ambient light exposure and add + points to the flash to manually add a bit extra, but the lights work it out with the camera for the most part.
This is commonly used outdoors when mixing natural light and flash, and at events where you need to be very quick (weddings, for example).
Flash Sync Speeds
There are two types of sync speed that you need to know about, the native sync speed of the camera and high speed sync (HSS). A Sync speed is just the shutter speed of the camera in order to capture the flash being fired.
Native Sync Speed: This sync speed is the fastest shutter speed that your camera can use whilst still capturing a flash firing. The native sync speed for most camera is around 1/160s to 1/250s. If you set your shutter speed higher than this, you will either get black bars over your image (that’s the shutter!), or your image will not have the flash exposure in it at all.
High Speed Sync: This mode uses a different duration of the flash to elongate it, usually at a slightly lower power, to allow you to shoot above your native sync speed. You need this if you want to freeze action but your lights have a poop flash duration (too long) or if you want to shoot at a wide aperture in bright daylight with flash, where using the native sync speed would mean a horribly overexposed image.
Although you could just use HSS all the time, it’s worth understanding the theory and using the native sync speed where possible, so that you can use HSS in exceptional circumstances as appropriate. Also, not all lights offer HSS!
Flash Exposure Settings
There are two exposures to control when shooting with flash, these are:
- The flash exposure, and
- The ambient exposure
The flash exposure is usually sorted second, after the ambient exposure has been dialled in. You will need to be using a camera that allows you to control your exposure triangle, but you can use semi-auto modes for TTL shooting. Let’s look at manual, non-high speed sync here.
Ambient Exposure Settings
Using the theory that we have a native sync speed in play for your photographic goals here, we can assume that the shutter speed will be set around the sync speed. Let’s say that is 1/160s.
With our shutter speed set, we can then look at ISO. Most studio photographers will shoot between ISO 100 and ISO 400, so let’s stab in the middle there are ISO 200.
That leaves aperture. It’s going to depend on how much ambient light you want entering the camera here as to what you’re going to set. Usually, in studio you want the subjects entire head in focus, which for dogs leaves us around f8 to f11 and with zero ambient light – perfect. For other uses, like outdoors, you might want a super shallow depth of field. With f2.8 dialled in and ISO.
If the ambient exposure is still too bright, drop your ISO.
If the ambient exposure is still too bright, you need to either sacrifice your depth of field and increase your aperture, or you need to use HSS to increase your shutter speed.
Flash Exposure Settings
There are 4 ways to adjust your flash exposure. You can do any of these options:
- Power fraction on the light
- Move the light
- ISO
- Aperture
Note: Shutter speed has NO impact on the flash exposure in your image.
Let’s look at those in a little more detail:
1. Change the power fraction on the light
You can easily change the brightness of the flash by turning the power up or down on the light itself. This is the best way to go (in my opinion!).
2. Move the light
You can increase the brightness of the flash by moving it close to the subject. The reverse is true too. This is usually not the best plan of action though because changing the distance of the light to the subject also changes the fall off and light softness. Usually, you don’t really want to do this.
3. Change the ISO
ISO will impact both the flash and the ambient exposure so if you are increasing your ISO, you will brighten both parts of the scene. The reverse is also true. This is because ISO is the sensors sensitivity to light – any light.
4. Change the Aperture
Aperture is an odd one, it usually has more of a difference on the flash exposure than the ambient, but in my opinion it does effect both. It is, however, the quickest way to alter the flash exposure if you can’t alter the power of the lights themselves.
My order of choice would therefore be:
- Change the power of the light
- Change the aperture
- Move the light
- Change the ISO (unless you’re mixing and want more of both types of light, in which case, ISO it is)
As you can see, there’s a lot to be getting started with there, so focus on learning and understanding all of that, then practice. Just try things out! After you’ve given it all a go and feel reasonably confident, why not try something from the flash photography or studio photography sections?

