
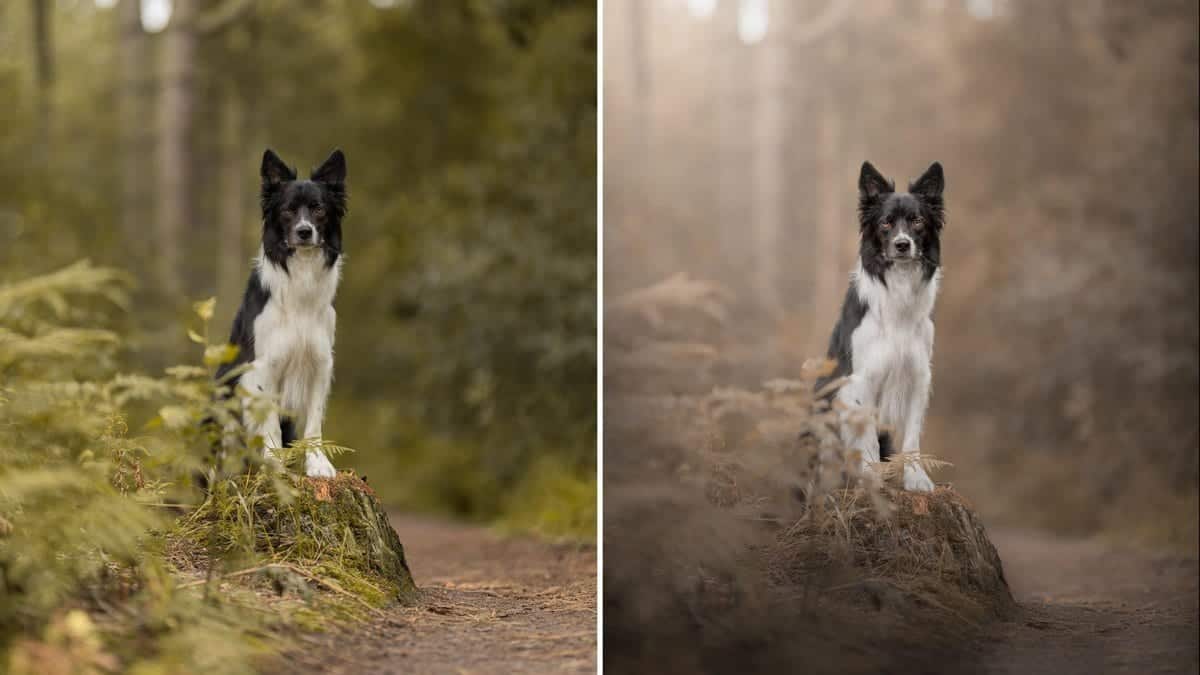
You guys absolutely jumped on the moveable colour section from the Full Edit of Pippi the other week, but since then I’ve seen some issues in the application that I really want to address. Today, there’s a new how-to and it covers application tips for success when using radial gradients to alter light in Photoshop:
So what does this topic cover?
- How to apply moveable colour (radial gradient) in Photoshop
- How to place it to take advantage of the light already in the scene
- How to shape it to make sense in the scene
Let’s get stuck in:
1. Create the Radial Gradient in Photoshop
The first thing to do is to mask the subject out. You can do this before or after adding the actual gradient layer but in this example, I do it before. There is a comprehensive video about masking around fur in Photoshop which I would wholeheartedly recommend, you can see that here.

When you’re happy with your mask, the next step is to add the actual gradient adjustment layer to your image. To do this, you need to go down to the adjustment layer icon right at the bottom of the Layers side panel (look for a circle cut into two).
From the list that pops up here, choose Gradient.

You’ll then end up with a black bar across the bottom of the screen in most cases. That’s ok, you need to head into the “Style” dropdown and select Radial. This will make a coloured blob which fades from black to nothing on the image.
Click on the colour strip above the Style dropdown and you’ll get a new little window with a new colour strip. This one will have little arrows above and below the strip. Click the bottom left arrow. Then, click the square showing black underneath the gradient strip with the arrows.
You’ll now have yet another window, this time, a colour picker. Click and drag in the big colour square right up to the top left – that will change the colour in the gradient from black to white. Click ok on all windows to come back to the main image.

Set the Radial Gradient in the scene
Remember the mask that we made before? We need to click and drag that up onto the radial layer. It’s as simple as that – click on the actual mask (not the layer you masked from, not the mask on the radial adjustment layer, it has to be the mask with the subject cut out).
Click and drag that mask onto the radial layer. You may get a pop up to ask if you want to confirm the replacement of the mask – you do. Click yes.
With the mask on the right layer, it’ll look really strange now because the radial will actually be inside the dog area of the image. Don’t panic, click that mask that you just moved once more, and hit Command+I (Mac) or Control+I (Windows) to invert the mask – this will swap black for white and white for black.
The radial should now be on the outside of the dog with an edge between the two, like so:

Ok so now you need to position your light source in the scene. This is going to change for every image, so I can’t give you a one size fits all here. The best bet is to look at any differences in light and shade on the dogs face and put the radial in the direction of the natural light source. If the image is backlit, you can go anywhere in theory.
To move the gradient, double click on the gradient adjustment icon which will look like a square with a white section at the side and a clear section to the other side, sitting next to the mask with the dog cut out, with a link icon in-between. You need to double click on that gradient to bring back up the gradient panel.
Once open, you can literally click and drag the light all over the screen. So just go ahead and click and drag the light circle to where the light is actually coming from.

Click ok on the windows to lock that change in.
Once here, change the opacity of the gradient layer itself to suit the image from just above the layers list. Lighter backgrounds mean you can go higher, say 80%, darker backgrounds mean much less, say 20%.
Then, head into the layer modes/styles dropdown by clicking where you see “normal” above the layers list itself. This opens a dropdown. I find lighten and screen work best for most situations – see what you think.

Next, we can alter the colour of the effect if needed. If you have quite a moody deep scene, you’re probably best leaving this on white, but if your image is warm, you are definitely going to want to alter the colour to be warmer.
To do this, double click back into the gradient itself, back into the colour section to open up the window with the triangles/arrows above and below the colour section and click the bottom left arrow again and into the Colour window showing white below the slider section.
In the colour palette, pick a very very very light, whitish colour from an orange palette as seen in the image below. Ok all that in to close the pop-up windows for the gradient.

The next step is to grab onto the mask that has the dog cut out of it and mask once more, this time using a big soft brush at about 50% opacity to leak some of that radial onto the dog.
Areas for focus are:
- The dogs back to the light
- Between the ears
- Around any white or light fur

Add depth and realism to the Radial Gradient
With your light in place, you haven’t finished just yet because you’ve added light and therefore there needs to be shadow. Every action creates an equal and opposite reaction – the amount and strength of light you’ve added needs to be mirrored in the shadow.
I prefer adding shadow using a midtone curve. To do this, create a new adjustment layer using that little circle split in two at the bottom of the layers panel and choose Curves from the list.

This should automatically open up the properties window with a graph in it. Pull the middle of the graph down to halfway between the line in the centre and the line below it. You can always go back and pull this down further.
The whole image will be darker, this is ok. Click the white mask next to your curves adjustment in the layers panel and invert it (command+I or control+I). Then, grab a big soft brush and make sure it’s white. Go ahead and paint shadows on areas that should be in shade with your new light source.

Because we haven’t flattened any of the layers, you can go back and change literally everything that we’ve just run through. You can change the position and colour of the light, the size of the light, the depth of the shadow, the mask on the dog and the opacity of each of the above elements.
This is non-destructive editing and you can continue to tweak for days if you’d like.
After I did the above, I just did my normal subject edits, added a touch of a vignette and cloned out the plant to Alfie’s side.
Total editing time had I not been recording the how-to = 20 minutes.
Bang on! Love it! Thank for this.