
I know that a lot of you get a bit confused when we’re doing photoshop tutorials but your workspace doesn’t look the same. So, to rectify that, I’ve added an extra video this week to get set up to match my workspace from start to finish. It may not be a sexy topic, but it’s definitely useful! Let’s get started:
Link to the video walkthrough:
The process
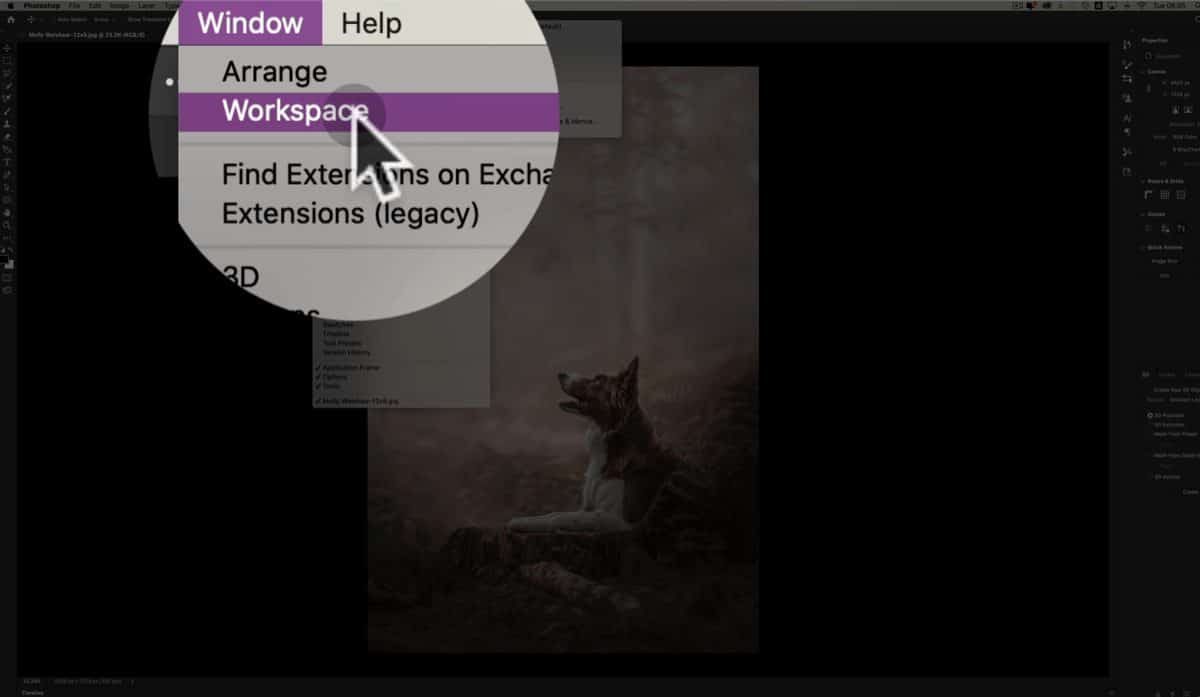
To start with, open Photoshop CC. Then, head up to Window on the top bar. Hover over “Workspace” there like so:

Then, choose “Essentials (default)” from the list:
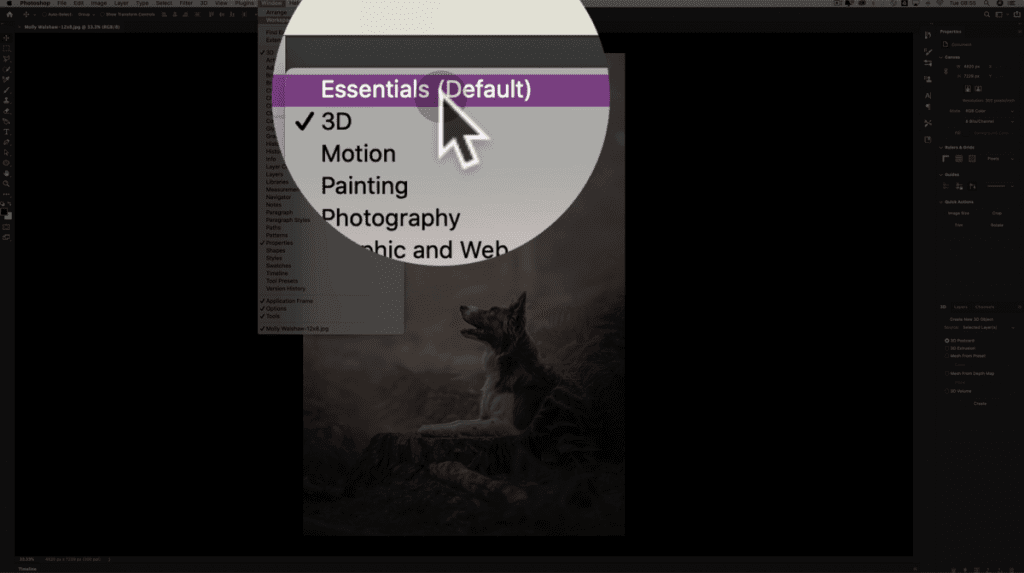
There’s a high chance that absolutely nothing will have changed for you – that’s ok. Repeat the Window -> Workspace steps we’ve just looked at but this time, head to the bottom of the submenu and select, “Reset Essentials”, like this:

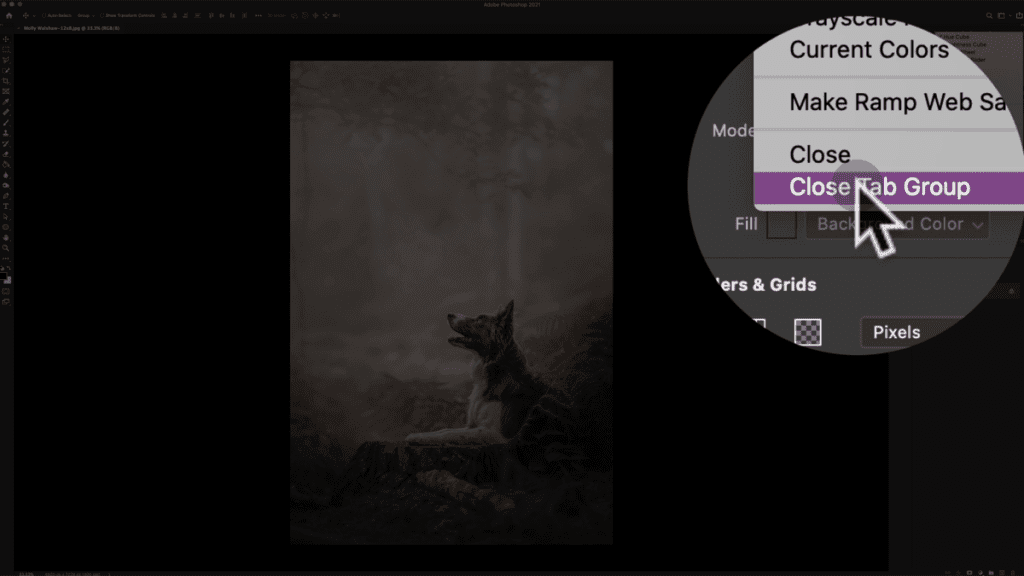
Now you’ll have 3 sets of tools on the left hand side of the screen, one will be colours, the next will be properties and adjustments, the last will be layers and paths. We don’t need the top colour one, so head up to the top right of that tool panel and look for 4 lines. Click on this and you’ll get a menu:

In this menu, select “Close Tab Group”. The colours will then disappear from the tool section on the right hand side.
Next, click on “Adjustments” which will not be in the top tool group. This will reveal a little panel of icons. With the icons showing, head back into those 4 lines to reveal the menu and select “Close”. Adjustments will then disappear.

Next, we’re going to add some tools. Head up to Window and select “Actions” from the list.

With actions now open, click and drag the title “Actions” over to the top tool panel on the right hand side, it should nest the Actions list into the same panel as Properties and Libraries.
Head back up to window and, if you want to, you can add my other tools that I have out – Clone Source and Paragraph. These sit in the little strip between the image window and the right tool panels for easy access. This step is completely optional.
Next, we’re going to set a custom background colour. For this, right-click on the black/grey background around the image. A list will pop up and one of the options will be, “Select Custom Colour”. Choose this option.
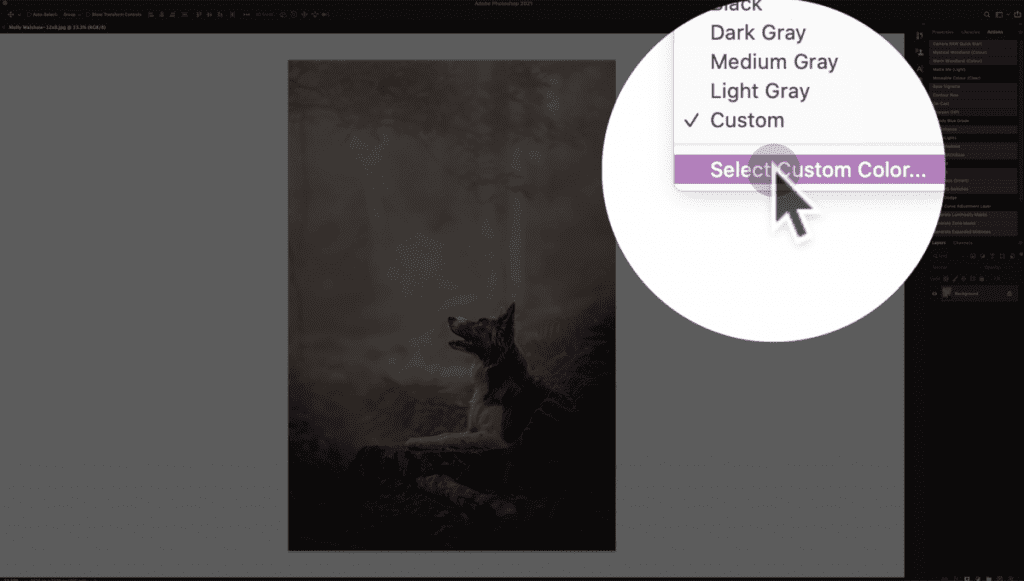
In the selection box that appears, make sure you select pure white by dragging right up and past the upper left corner of the colour picker, or by typing 6 “f”s into the text box at the bottom of the panel so it would then read: ffffff like so:

Now, you can switch your background colour from black to white with ease by right-clicking on the background at any time and select one of the options, where Custom is now white. I usually leave mine on dark grey for most editing work.
Next, head up to the main menu at the top and you need to find the Preferences panel. The location of this will differ on Windows and Macs, but it should be in one of the first two menus from the left and once in, you’ll get a box with a list of options down the left, starting with General.
In here, go to Cursors. Match your settings to mine here if there are any differences:

That’s it, all done! Your Photoshop now matches mine completely. You hopefully will never get lost again ?
