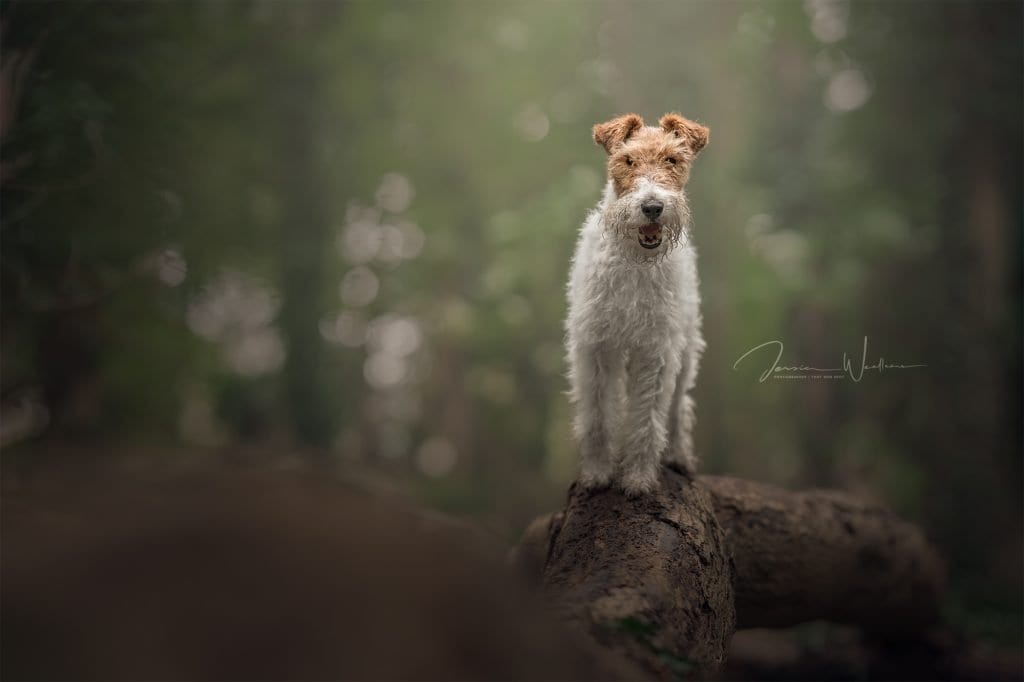
Requested by a workshop participant last weekend, this post and video covers how to replace backgrounds in Photoshop to quickly composite images, removing leads, distractions and more in seconds. Yes, this does involve having an empty shot but if you shoot proactively, you’ll cut your editing time by a huge amount. Remember, efficiency is the aim of the game here!
Link to the video walkthrough:
The process
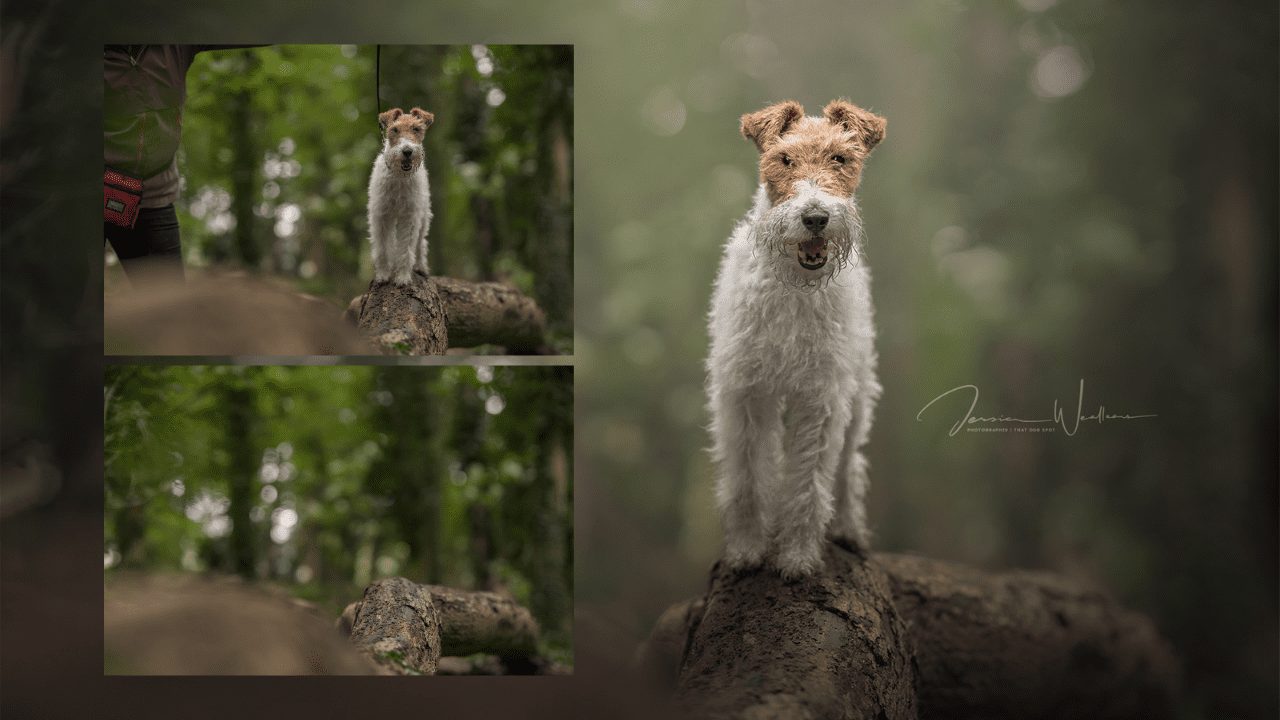
For this video, I started with two photographs – one with the dog and distractions and one completely empty scene. This technique of shooting dogs on leads was shown in this video here, but it’s one I use often and this was another such example.

It’s very important that those images both have the exact same treatment – the same white balance, exposure and denoise adjustments to ensure they are as similar as possible at this stage. Do not crop either image.
When you have your dog and reference image sorted, select both and right click on them to open in Photoshop.

In Photoshop, you need to select all of one image and move it into the other. To do this, with the image open in front of you, press CMD+A or CTRL+A if you’re on a Windows computer. That will create a small line of marching ants around your image.
Then, press CMD+C (or CTRL+C) to copy those pixels.
Switch to your other image and press CMD+V… or CTRL, you get the idea… to paste the copied pixels over this image too. That will overlay one layer above the other, like so:
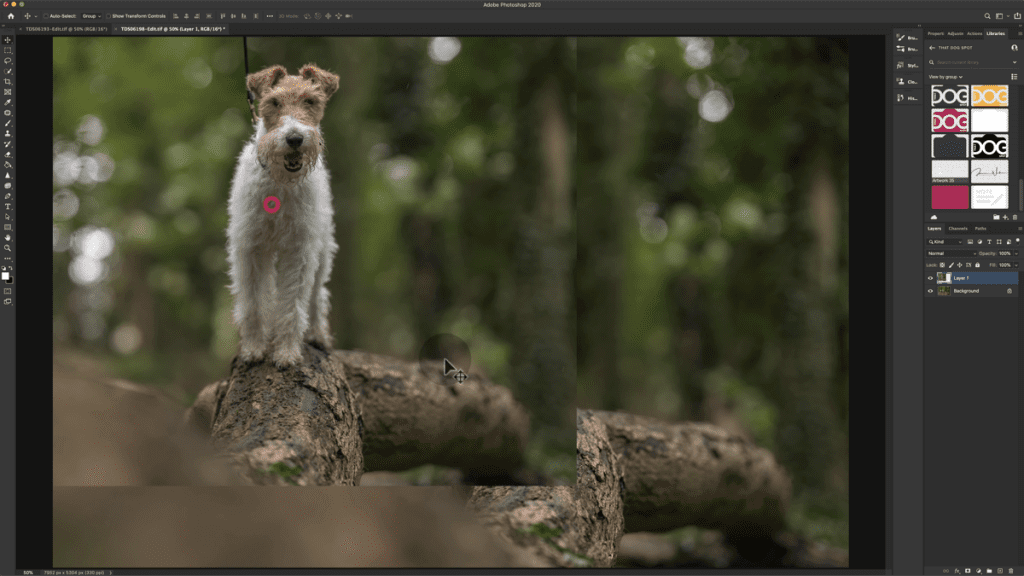
Now, reduce the opacity of the top layer to 50% or so and begin to line up the two images. Focus on landmarks like ridges, rocks, trees or logs. In this case, I focussed on a few different bark patterns in the log. If you need to rotate your layer, press CMD+T to bring up the transform controls. These will allow you to resize and rotate the layer as needed.

With your layer lined up as best as possible, turn it back to 100% opacity and add a blank mask:

Then, grab a big soft brush – it’s very important that it is soft! Because the mask is white we need to paint in black onto this layer and remove distractions and hard edges as required.

When you get to fine details like the leads, use a smaller brush of varying softness to work that area as neatly as possible. Be very careful to get a clean edge. Also, assess the bokeh around the area, do you need to complete any circles? Line up any trees?

With your compositing done, toggle the layer on and off to check you have a clean result on the main areas and edges.

Next, look at areas of high detail, contrast and sharpness. For me, that was my log but for you, it might be some tree branches or grass. You need to remove any “haze” caused by a bad line-up so for this I use a hard brush and focus on bringing specific landmarks back through the mask.

With that complete, and you happy as Larry, I usually duplicate both of those layers before right-clicking on them and choosing Merge Layers – that new layer, with the composite merged, becomes my working layer for the rest of the editing and the original two layers remain at the bottom of the layer stack, safe and sound, should I need them again.

That’s it, all done! Take your time and get proficient at this skill, it’ll save you hours! With practice, it will take less than 60 seconds to complete all of the above ?