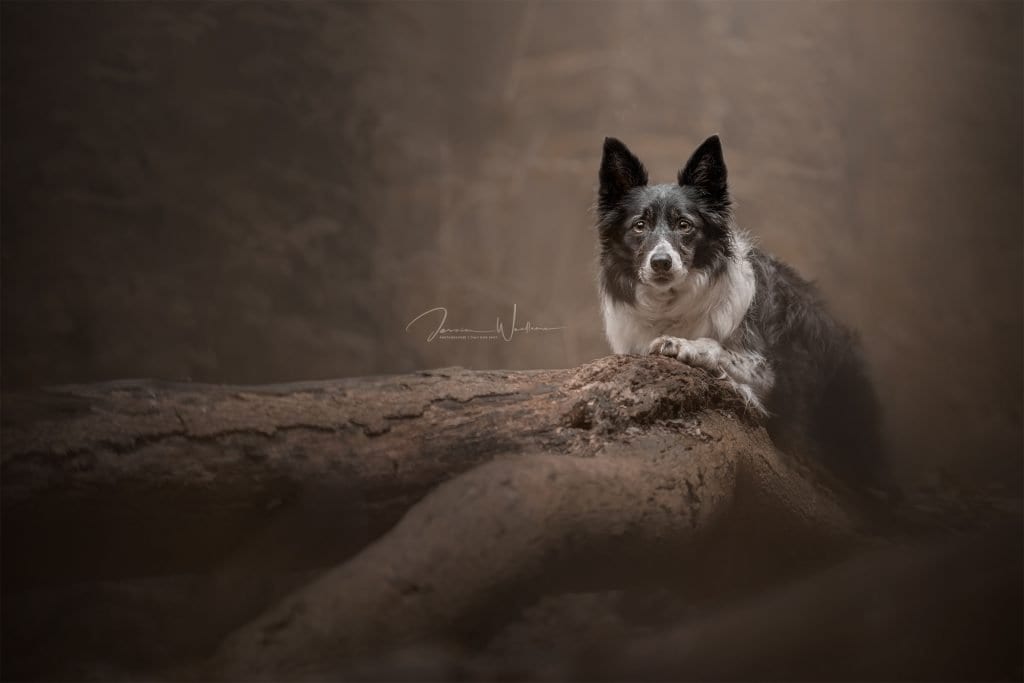
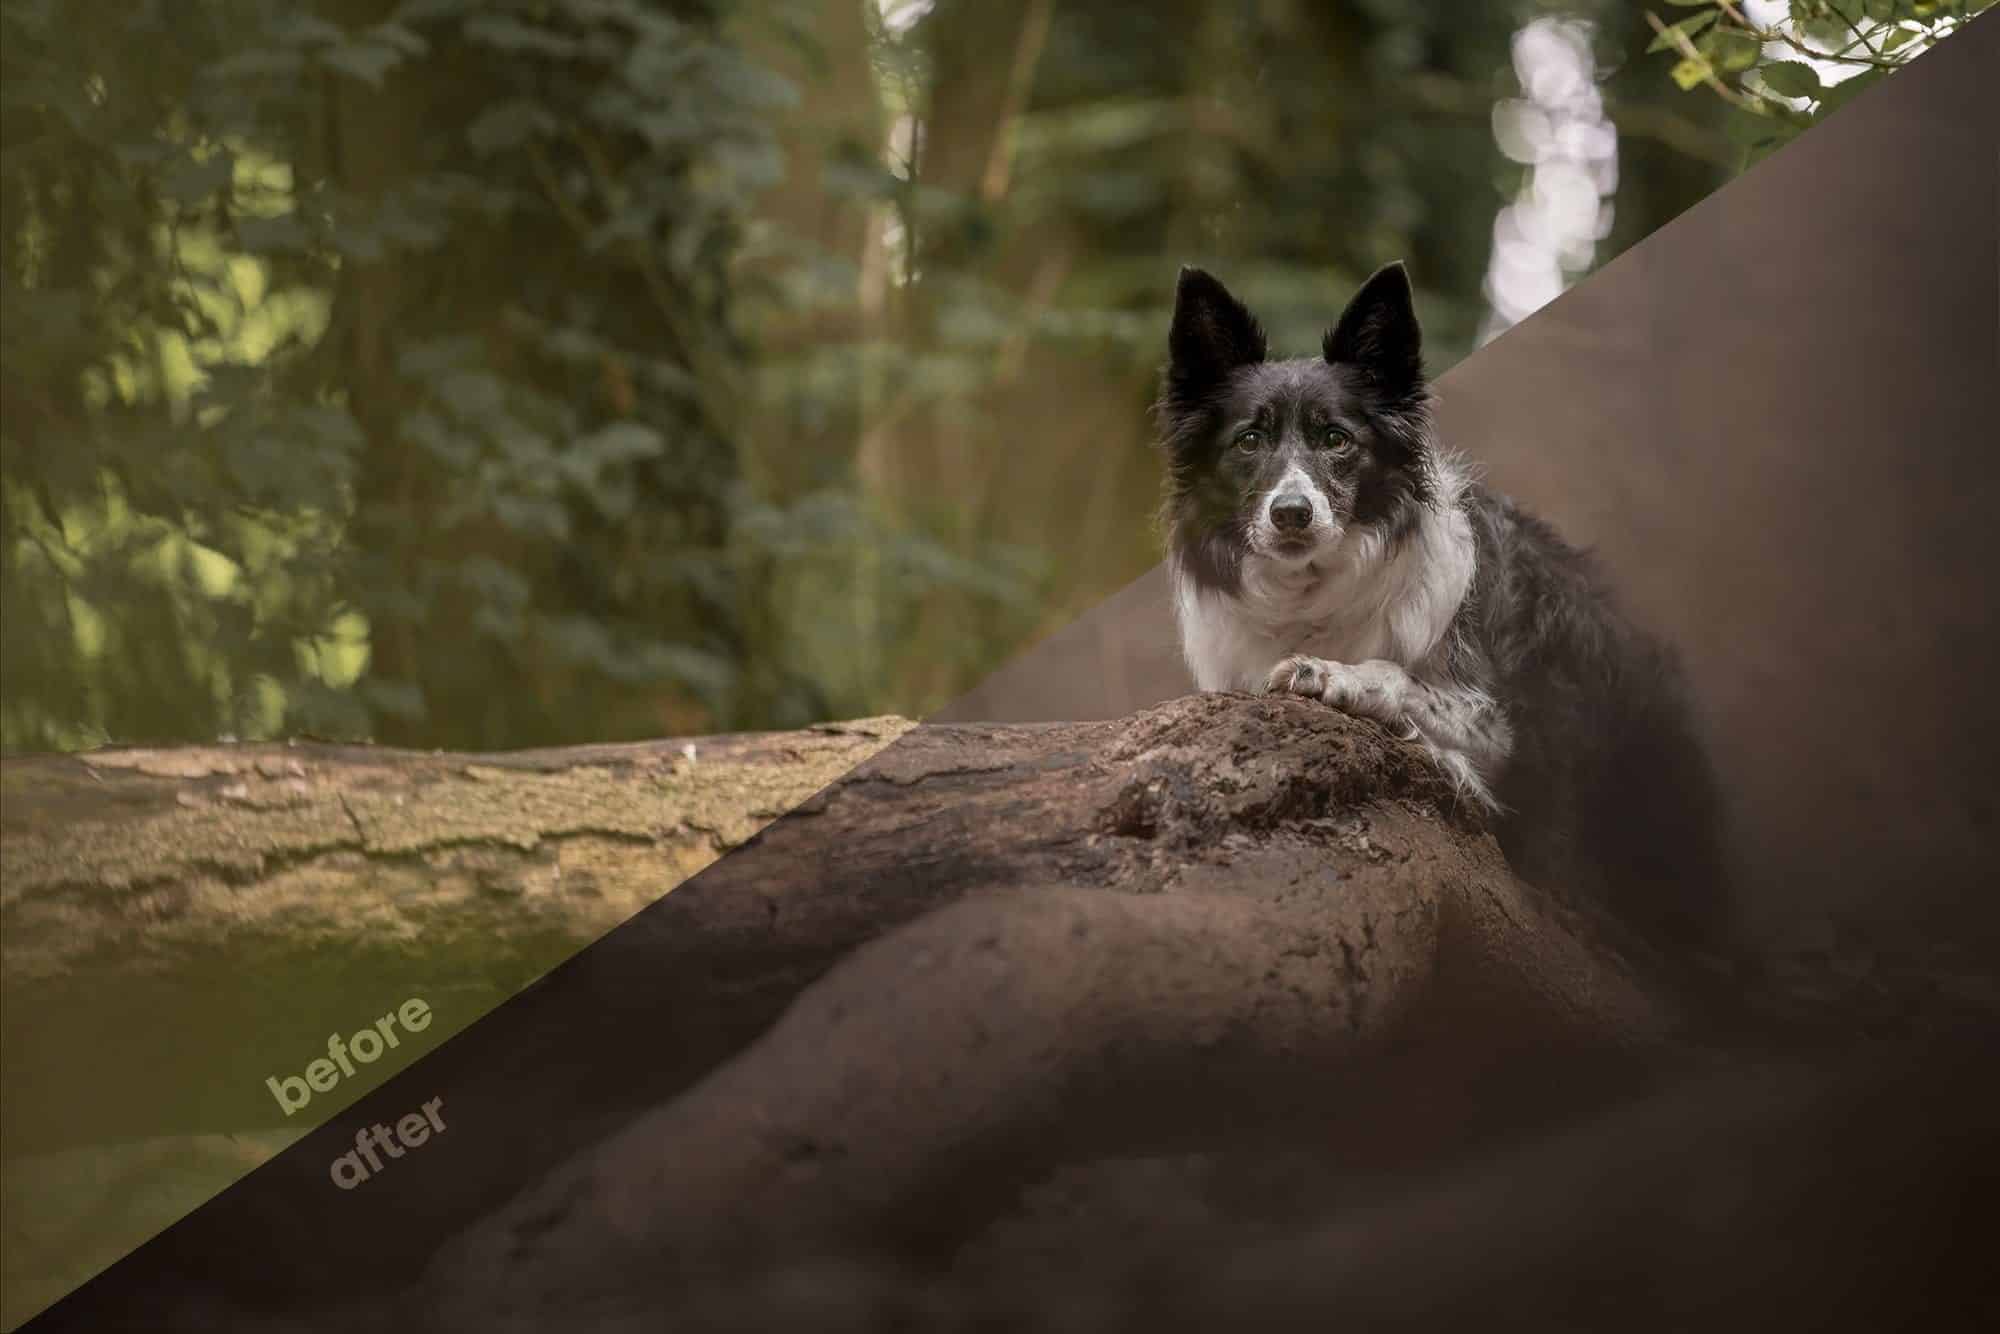
I get a bazillion messages, comments and questions about how to change colours in Photoshop and to be honest it’s really quite straightforward when you get the hang of it. I thought I may as well show you guys how you can do it and instead of using a super light, bright photo I selected an image that has so much deep green in it that you actually feel a bit overwhelmed!
This photo of Cara had a big sentimental meaning so I knew I wanted something calm, deep, thoughtful and really not distracting at all. I went de-saturated brown, you could have gone bright pink – thats the beauty of editing, you can go where you want to go!
Before you watch or read the how to, remember that for this you really need a 16-bit RAW file to work from. A JPG will degrade too much to get a clean finish.
The process
Okie dokie, step 1: Open the image into Photoshop (ideally not in sRGB colour space because it’s a teeny gamut and might struggle a bit!). Do your clean-up and cropping. Duplicate your image layer, right click on it and select “Covert to Smart Object”.

With your smart object layer selected, head up to Filter in the top menu and choose Camera Raw Filter. This opens what is essentially Lightroom in photoshop, aka, Camera Raw.

Grab hold of the white balance adjustor and try your absolute hardest to get the image to the correct white balance. For us, this was pretty straightforward by clicking on the top of Cara’s head, which is very much black.

In the colour mixer, make sure you are looking at the hue and then use the sliders to move multiple colours towards a single one. For me, my aim was to change the greens, so I moved the yellows into the greens, like so:

Complete any other adjustments like normal from your workflow in this window (for me, a double radial of course!) and then OK that out. Back in the normal PS window, you need to then add an adjustment layer from the bottom of the layers panel. Select Hue/Saturation from here.

In the properties tab, you will now have some colour sliders and a rainbow. To the right of the colour drop down, there is a little hand icon, click on this.

Looking at the image, try to select a deep dark version of the colour you want to change. This will help to shift the selection towards the colour you want to manipulate.

Then, grab the middle slider, Saturation, and push it up to +100. This will show you, very clearly, which colours are being manipulated and to where.

Grab hold of the middle of the rainbow slider and move it from left to right. You should see the colours change and some will move out of the super-saturated adjustment. Move this slider so that the colour you want to change IS selected and saturated, but the other colours are left alone as much as possible.

Next, grab the hue slider, the top one, and move this until your unwanted colour becomes the target colour.

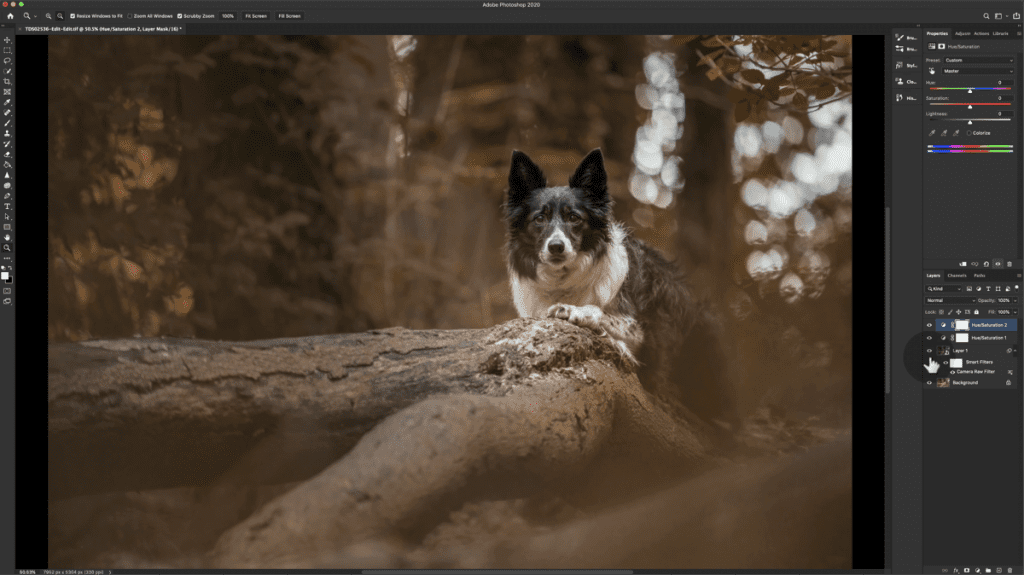
Next, fine-tune the hue, saturation and lightness of the colour to suit your preferences. There is likely to be some “residual” colour somewhere, try to ignore this for now. For me, it’s on the log in the middle and in the foliage immediately to the left of Cara’s head.
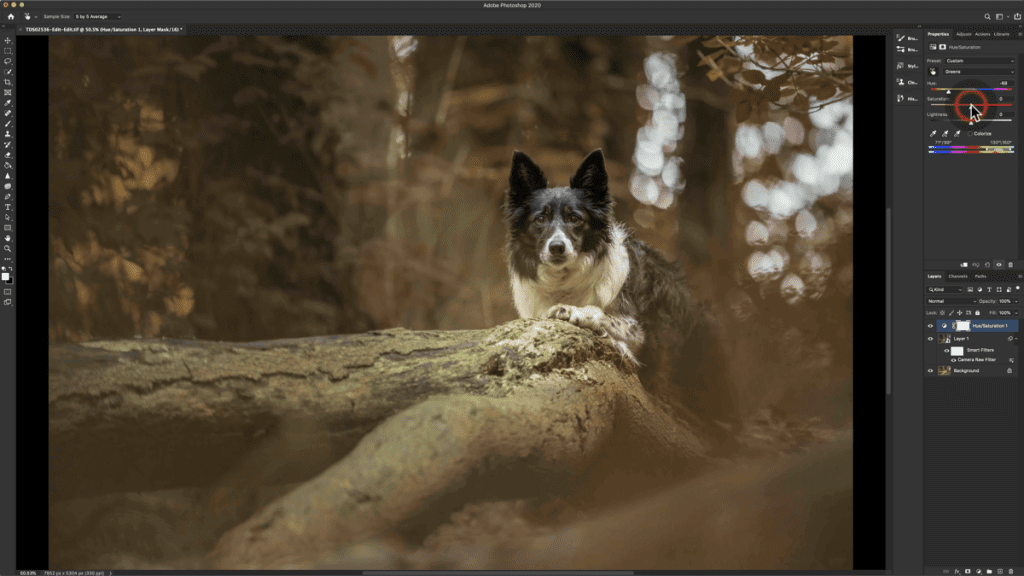
The residual colour now needs to be managed. Add a new Hue/Saturation on top of the previous adjustment layer, repeat the process of picking the colour you want to change with the hand icon.

To get a more specific colour selection, get hold of the little toggles on either side of the rainbow slider and bring them in, this limits the colours in the selection and allows for fine tuning of different tones.

Fine-tune the residual colours to suit on this adjustment.
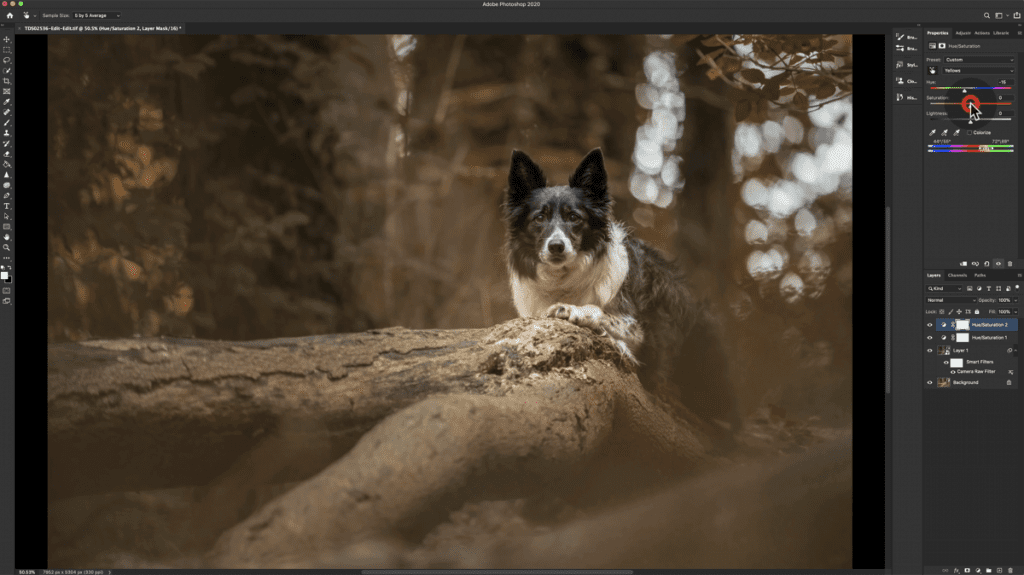
Now you need to really get happy with both adjustments, the main one and the residual one. To go back into an adjustment, click on the adjustment icon:

Then go into the master dropdown and select the colour you originally changed it from. You should see your adjustment sliders as they were earlier. If you can’t see it in that colour, try the others, it’ll be there somewhere!

When you’re happy, you may need to mask your subject out. If not, continue with your edit as desired. I left the colours here and then continued:
The final image this time looked like this:
